Upcycling is a sustainable approach to home decor that transforms old items into stylish decor [1]. This article presents 41 creative upcycled home decor projects that are budget-fr
iendly and easy to execute, offering inspiration for any DIY enthusiast.
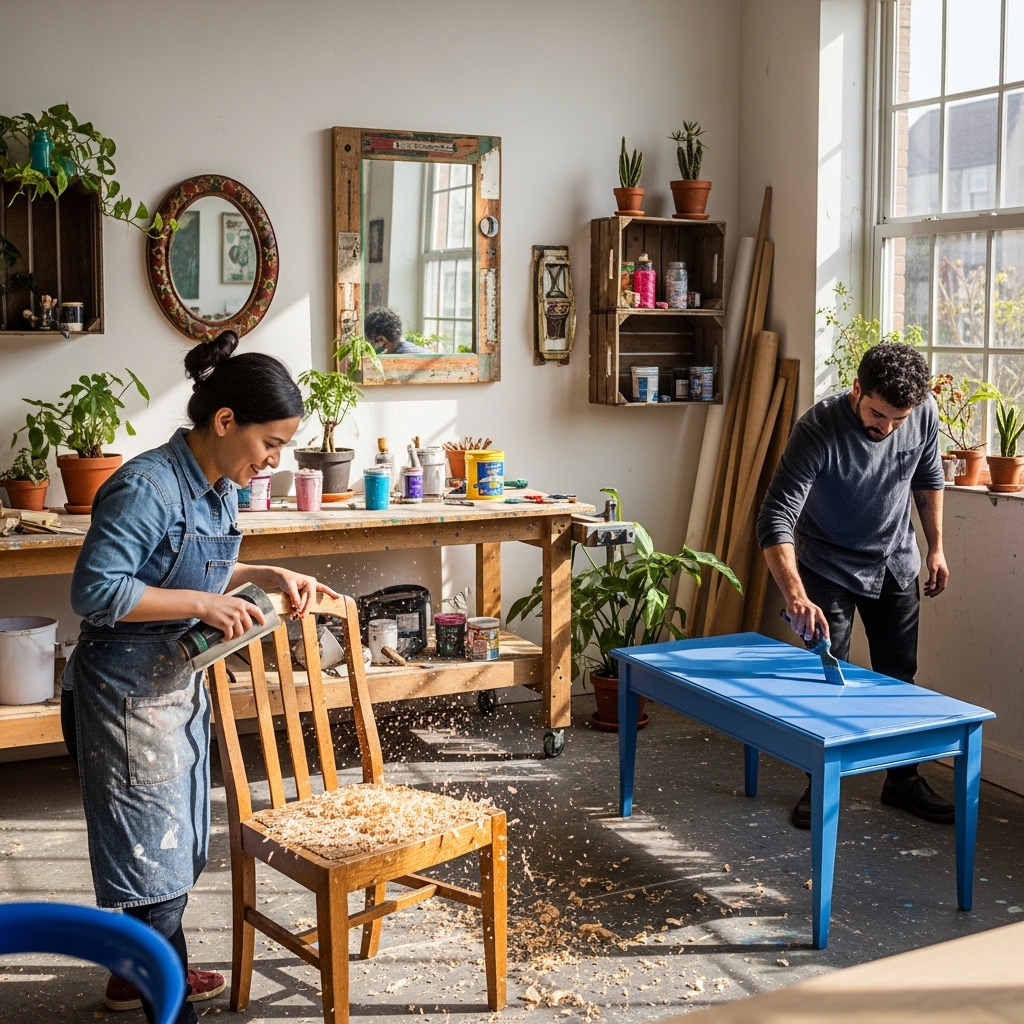
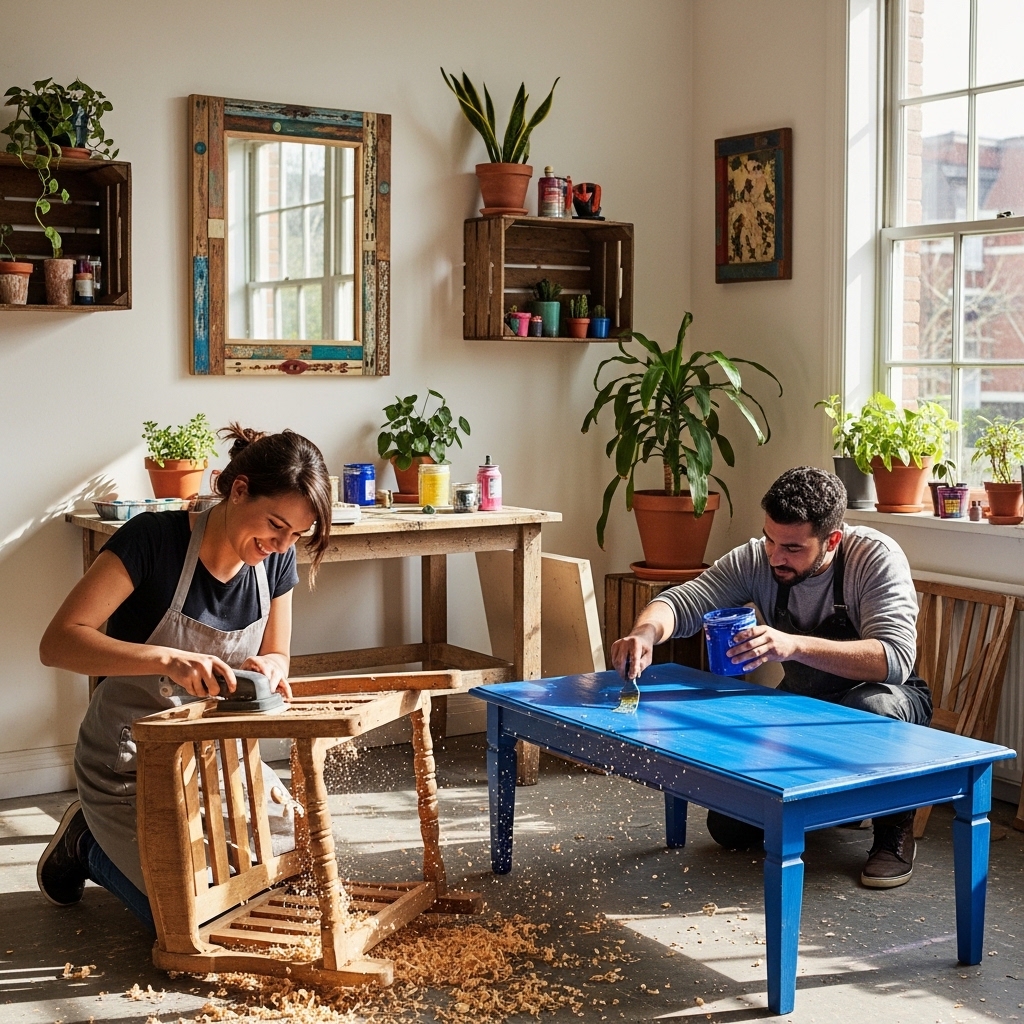
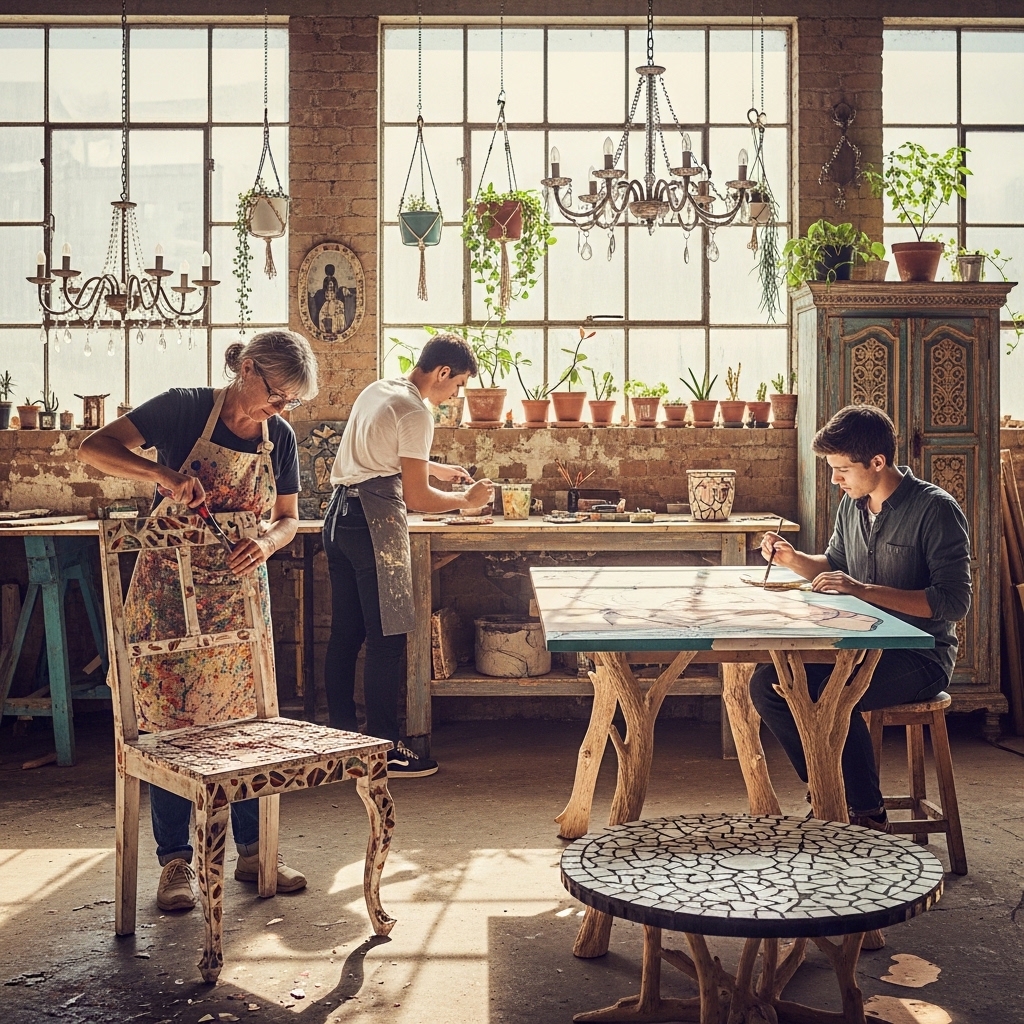
1. Upcycle Old Furniture into Stylish Statement Pieces
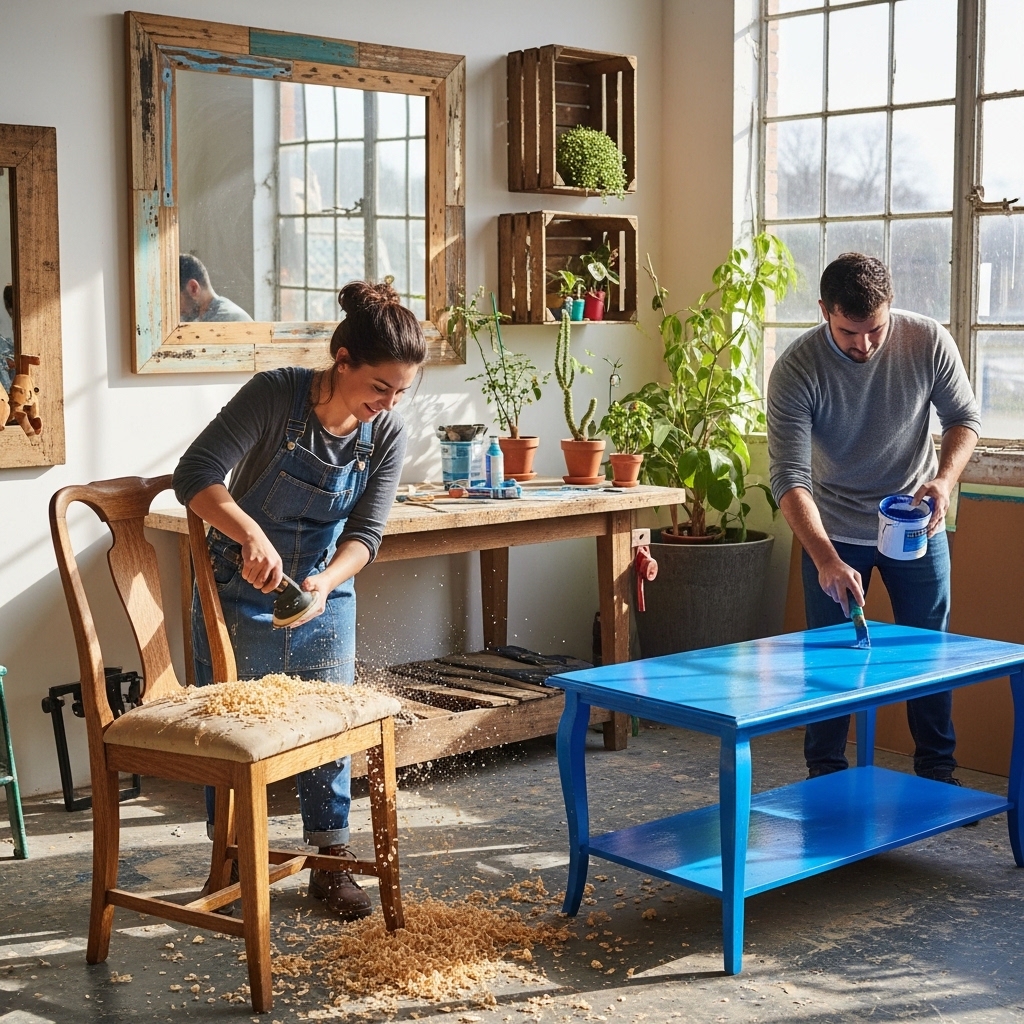
Transforming outdated or worn furniture into chic, functional decor is easier than you think. Upcycling not only extends the lifespan of furniture but also reduces waste, making it an eco-friendly choice. Here’s how to get started.
Select Furniture for Upcycling
Choose pieces that spark joy or have potential. Look for:
- Solid Wood Furniture: Sturdiness and durability make it ideal.
- Unique Shapes: Vintage finds can be transformed into statement pieces.
- Damaged Items: Worn-out furniture often holds character.
Assess what you already have or explore thrift stores for hidden gems.
Tools Needed for Furniture Transformation
Gather essential tools to facilitate your upcycling projects. Here’s a checklist to get you started:
- Sandpaper or a sander
- Paint or stain
- Brushes or rollers
- Adhesive for repairs
- Protective gear (gloves, mask)
Having the right tools simplifies the process and enhances safety.
Ideas for Common Furniture Items to Upcycle
Here are some creative ideas for common furniture pieces you can transform:
- Dressers: Paint the body and replace knobs for a fresh look.
- Old Chairs: Reupholster with vibrant fabric to add color.
- Tables: Create a mosaic top using broken tiles or CDs. This unique approach adds texture and interest to your space.
For a hands-on start, consider using an Upcycling Starter Kit – Craft Supplies. It provides essential materials for various projects. Check Price on Amazon.
Incorporating these ideas not only beautifies your home but also tells a story of sustainability and creativity. Embrace the art of upcycling and watch your outdated furniture transform into stylish statement pieces.
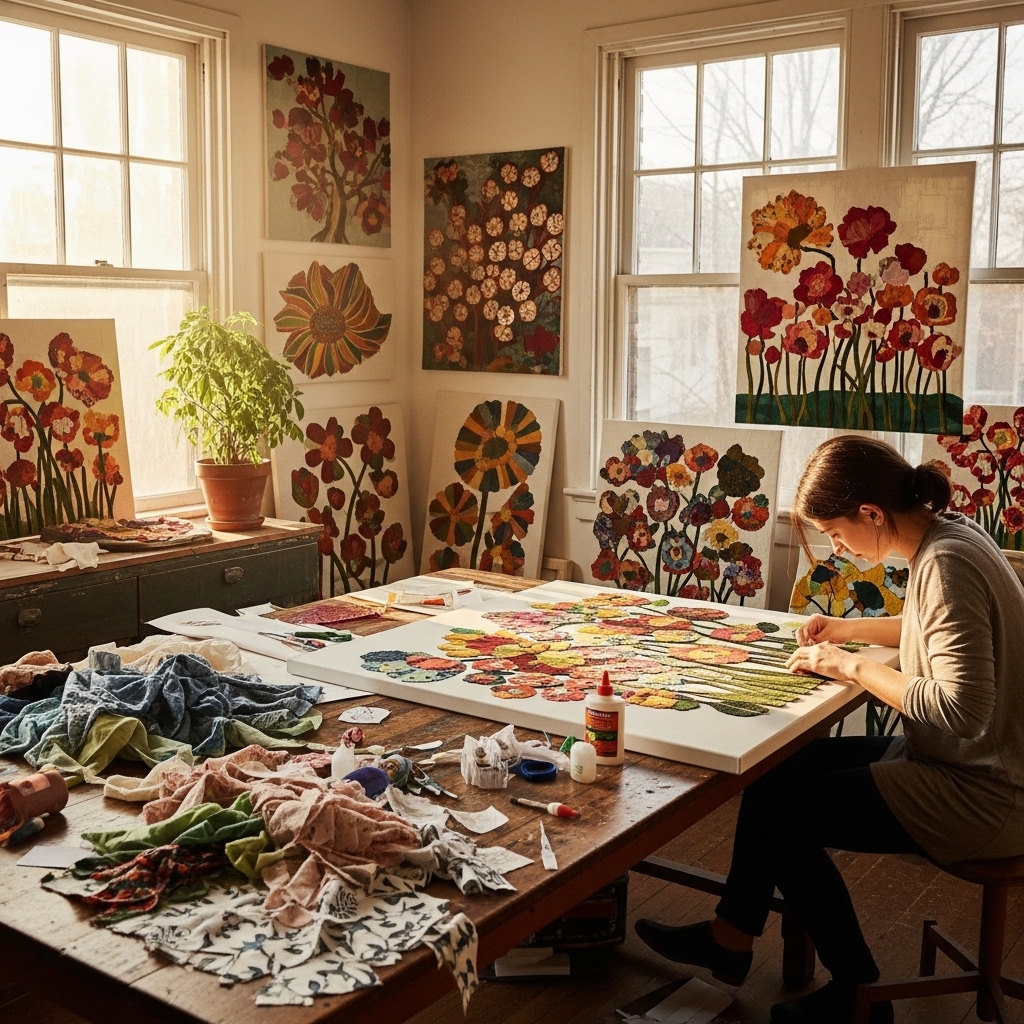
2. Create Unique Wall Art from Recycled Materials
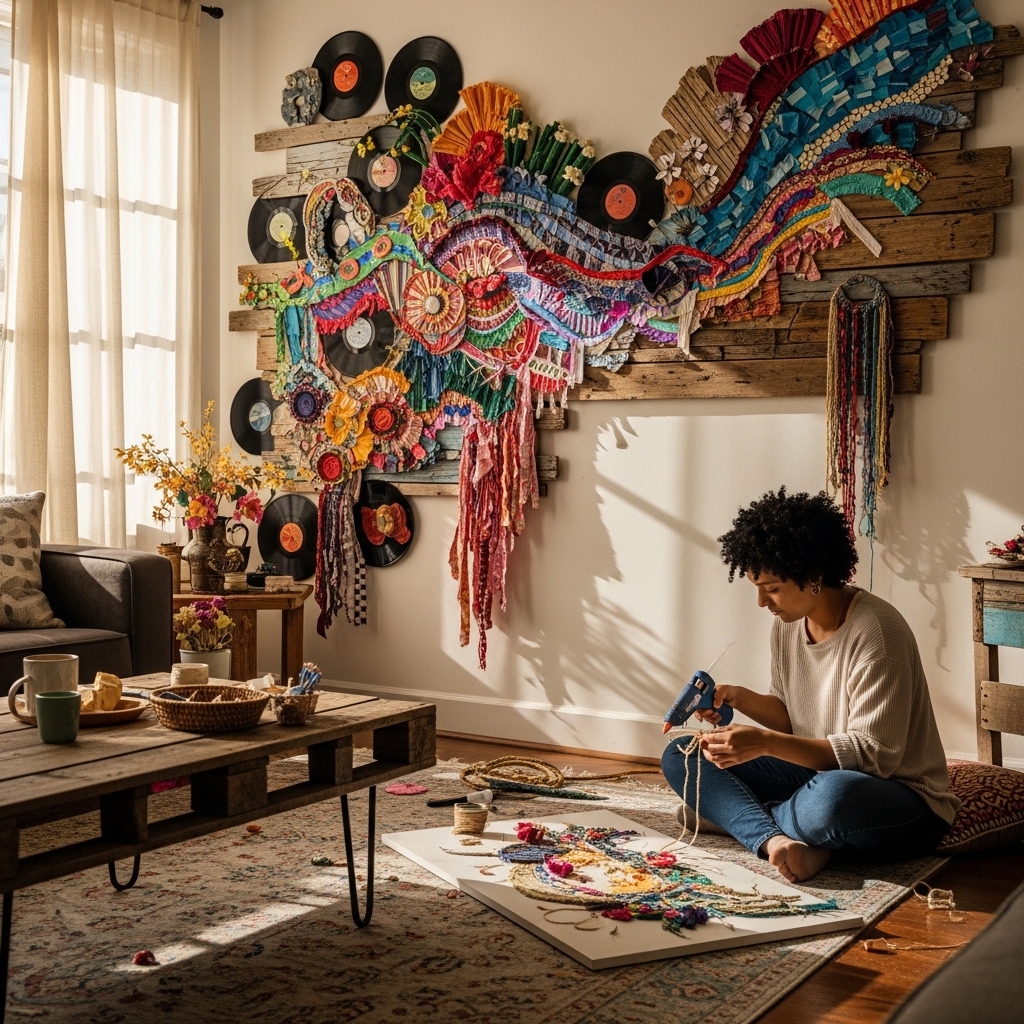
Crafting wall art from recycled materials is a fun and eco-friendly way to personalize your space. Not only does it repurpose items that would otherwise end up in landfills, but it also adds unique charm to your home decor.
Materials that Work Best for Wall Art
When selecting materials for your wall art, consider the following:
- Old Books: Use pages or covers to create collages or framed art.
- Fabric Scraps: Transform remnants into textured pieces with vibrant patterns.
- Game Boards: Turn forgotten games into colorful wall displays.
- Bicycle Parts: Incorporate wheels or chains for an industrial look.
These materials are readily available and can bring your creative vision to life.
Techniques for Assembling Wall Art
Here are effective techniques to assemble your recycled wall art:
- Collage: Layer different materials for depth. Use glue or staples to secure items.
- Framing: Frame your art for a polished look. Old frames can be upcycled too.
- Texturing: Combine various textures to make your piece visually interesting. Mix fabrics with paper or wood.
- Painting: Enhance your art with paint. Water-based craft paint works well for a colorful finish.
Experiment with these techniques to discover what resonates with your style.
Tips for Displaying Your Creations
Once your wall art is complete, consider these tips for displaying it:
- Gallery Wall: Create a cohesive look by grouping different pieces together.
- Neutral Background: Hang art against neutral walls to let colors stand out.
- Lighting: Use spotlights or fairy lights to highlight your artwork.
- Positioning: Vary heights for visual interest. Ensure smaller pieces complement larger ones.
These strategies help showcase your creativity and make your home feel inviting.
For those just starting, consider an Upcycling Starter Kit – Craft Supplies to gather essential materials and tools. Check Price on Amazon for a great selection.
3. Transform Glass Jars into Decorative Vases
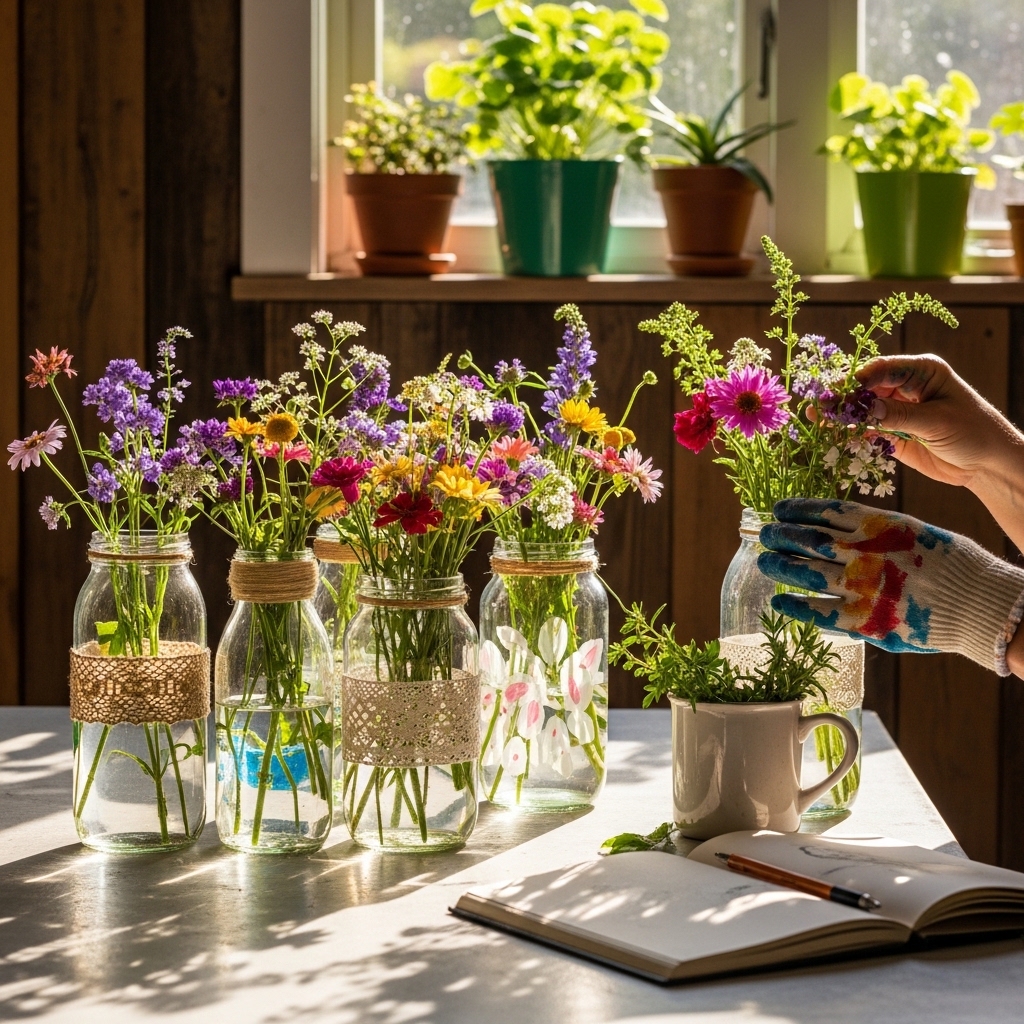
Upcycling glass jars allows you to create stunning vases that enhance your home decor. These projects are not only eco-friendly but also budget-friendly, offering a unique way to showcase your creativity.
Choosing the Right Glass Jars
Select jars that suit your style. Consider the following types:
- Mason Jars: Classic and versatile; great for rustic themes.
- Wine Bottles: Tall and elegant; perfect for statement pieces.
- Jam Jars: Small and cute; ideal for table centerpieces.
Make sure the jars are clean and free of labels. This step ensures a polished look for your finished product.
Painting Techniques for Jars
Painting your jars adds a personal touch. Here are a few techniques to consider:
- Acrylic Paint: Use for a vibrant finish. Ensure you apply a primer first for better adhesion.
- Chalk Paint: Offers a matte finish that’s perfect for a vintage feel. It adheres well to glass.
- Spray Paint: Quick and easy; just ensure you use it in a well-ventilated area.
To personalize further, try using stencils or washi tape to create patterns. This technique adds character and distinguishes your vases from store-bought options.
Ideas for Flower Arrangements
Once your jars are ready, fill them with flowers that complement your decor. Here are some ideas for arrangements:
- Single Stem Vases: Use tall jars with a single flower for a minimalist look.
- Wildflower Mix: Fill jars with various flowers for a cheerful bouquet.
- Dried Grasses: Use for a rustic touch, providing texture without the need for water.
For an added twist, consider grouping different sizes and shapes of jars. This creates visual interest and can enhance any space, from dining tables to entryways. Upcycling glass jars not only beautifies your home but also supports sustainable living practices [7].
4. Repurpose Wooden Pallets into Functional Furniture
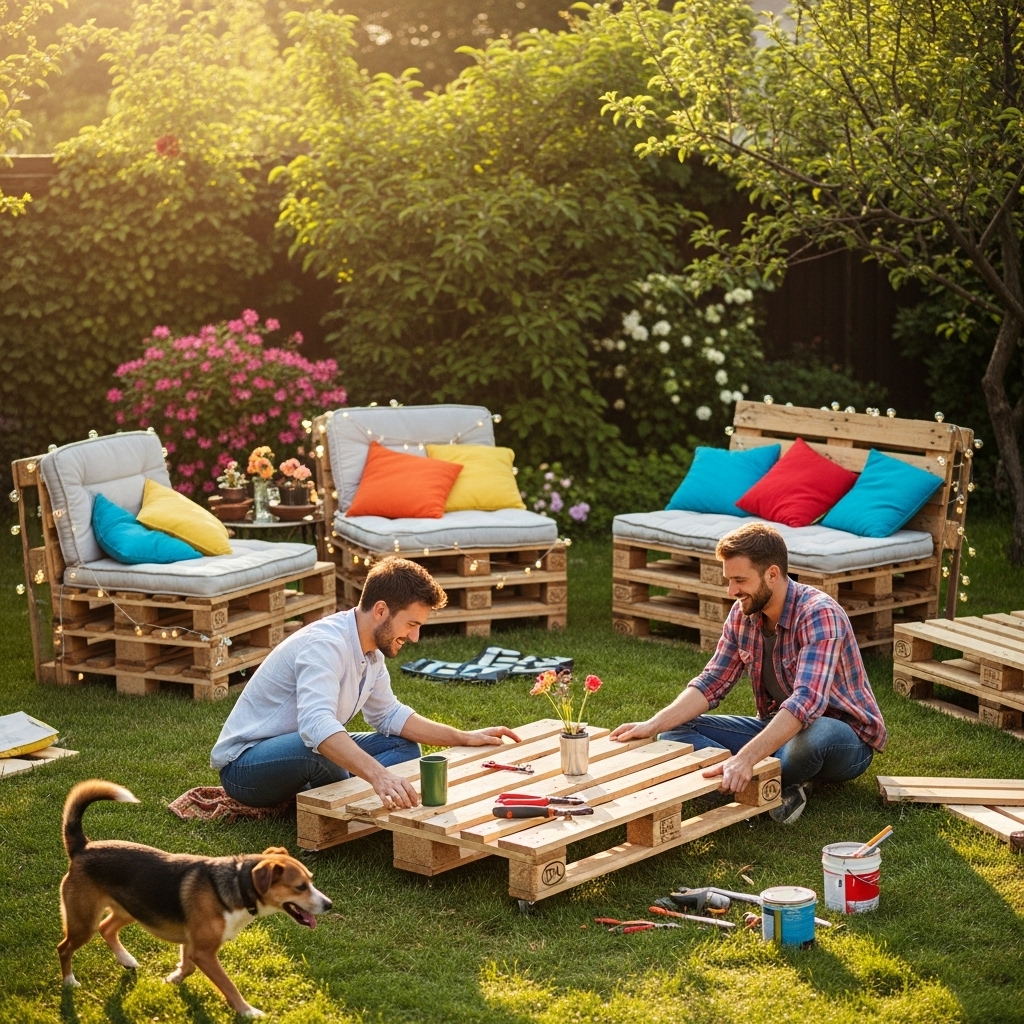
Wooden pallets are versatile materials that can be transformed into stylish and functional furniture. With a little creativity and effort, you can create unique pieces that enhance your home decor.
Types of furniture to create from pallets
- Coffee Tables: Stack and secure pallets to create a rustic coffee table. Finish it with a glass top for a modern touch.
- Sofas: Use pallets to build an outdoor or indoor sofa. Add cushions for comfort and style.
- Shelving Units: Create open shelves by stacking pallets vertically. This adds storage and a decorative element to your walls.
- Benches: Construct a simple bench by laying pallets side by side. Perfect for gardens or entryways.
- Wine Racks: Repurpose pallets into wine racks. They can hold bottles horizontally, showcasing your collection beautifully.
These projects vary in difficulty, making them accessible for both beginners and experienced DIYers.
Preparation and sanding tips
Before you start, ensure your pallets are safe to use. Look for the “HT” (heat treated) stamp, indicating they’re safe for indoor use. Follow these preparation steps:
- Inspect the Pallet: Check for broken boards and sharp nails.
- Clean Thoroughly: Remove dirt and debris using a stiff brush.
- Sand the Surface: Use medium-grit sandpaper to smooth rough areas. This prevents splinters and prepares the surface for finishing.
Proper preparation ensures your furniture is both safe and attractive.
Finishing touches for a polished look
Adding a finishing touch enhances the aesthetic quality of your pallet furniture. Here’s how:
- Stain or Paint: Choose a stain that matches your decor. Alternatively, paint it a bold color for a statement piece.
- Seal the Surface: Apply a clear sealant to protect against moisture and wear.
- Cushions and Fabrics: Use outdoor fabric for cushions if your furniture is for outdoor use. This adds comfort and style.
These finishing touches elevate your upcycled project, making it a standout feature in your home.
5. Make Stylish Storage Solutions from Old Suitcases

Upcycling vintage suitcases offers a unique blend of style and functionality. These charming relics transform clutter into chic storage solutions. Let’s explore how to make the most of old suitcases in your home.
Selecting the Right Suitcase
When choosing a suitcase, consider these factors:
- Condition: Look for sturdy frames and intact hinges. Minor scuffs add character, but avoid heavily damaged pieces.
- Size: Select a size that fits your space. Larger suitcases work well as coffee tables, while smaller ones can serve as nightstands.
- Style: Opt for vintage styles that match your decor. Patterns and colors can add personality to any room.
Ideas for Interior Organization
Here are creative ways to use upcycled suitcases for storage:
- Coffee Table Storage: Place a large suitcase on a stylish base. Open it to reveal hidden storage for books and blankets.
- Nightstand: Stack smaller suitcases beside your bed. Use them to store reading materials or personal items.
- Wall Art: Hang a suitcase on the wall. It becomes a unique shelf for displaying decor items or plants.
Decorative Finishes for Suitcases
Adding decorative finishes enhances the suitcase’s appeal:
- Paint: A fresh coat of paint can revive an old suitcase. Use colors that complement your room.
- Fabric Lining: Line the interior with fabric for a soft touch. Choose patterns that reflect your style.
- Hardware Upgrades: Replace old locks and pulls with vintage or modern hardware for a fresh look.
These steps not only create functional storage but also improve your home’s aesthetics. Upcycled decor improves home aesthetics and promotes sustainability, making each project meaningful in its impact on the environment and your living space [9].
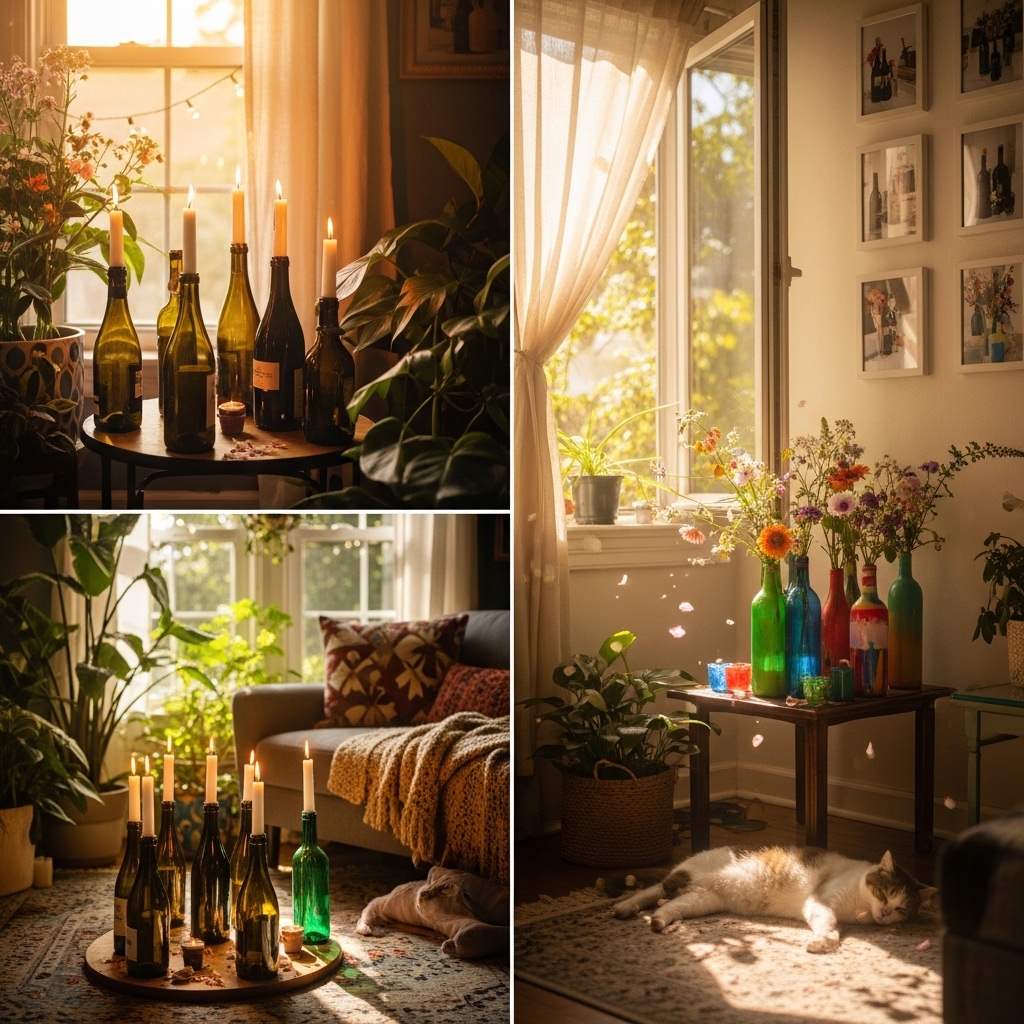
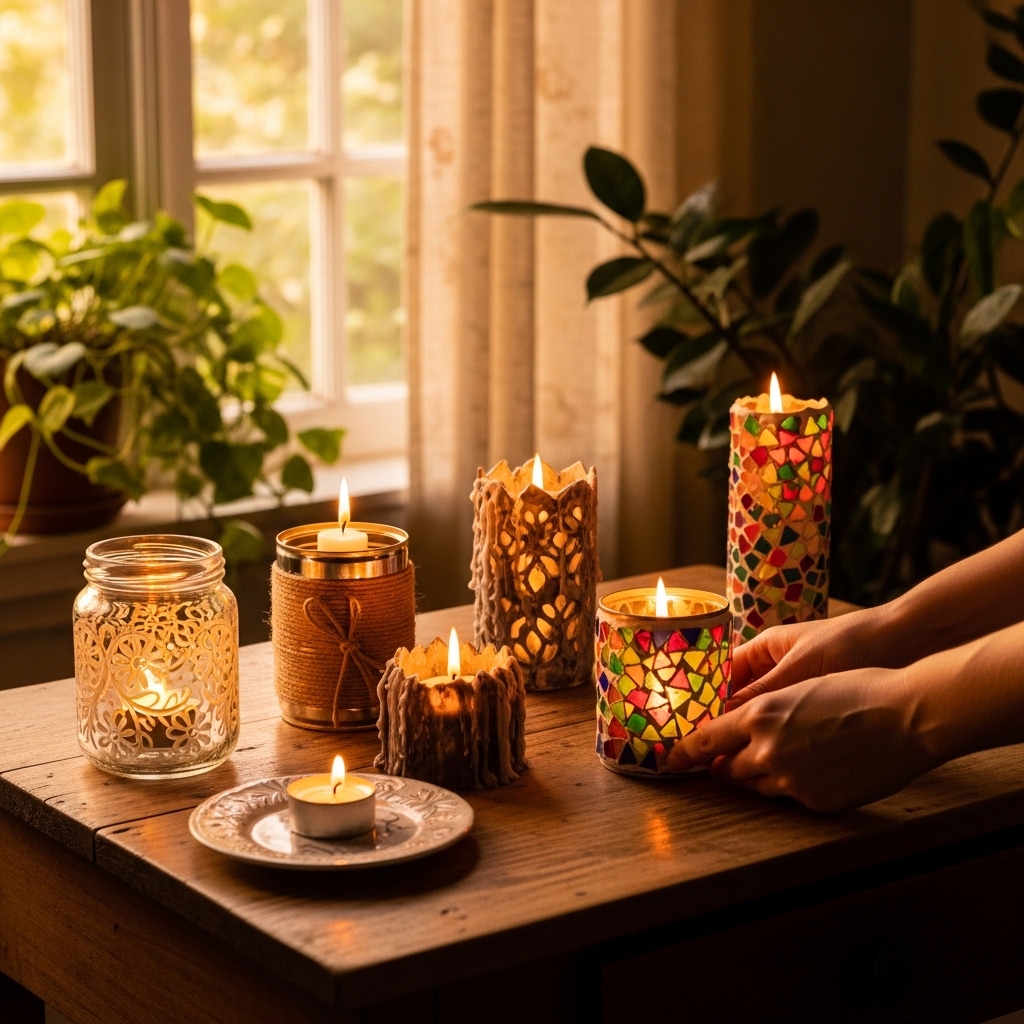
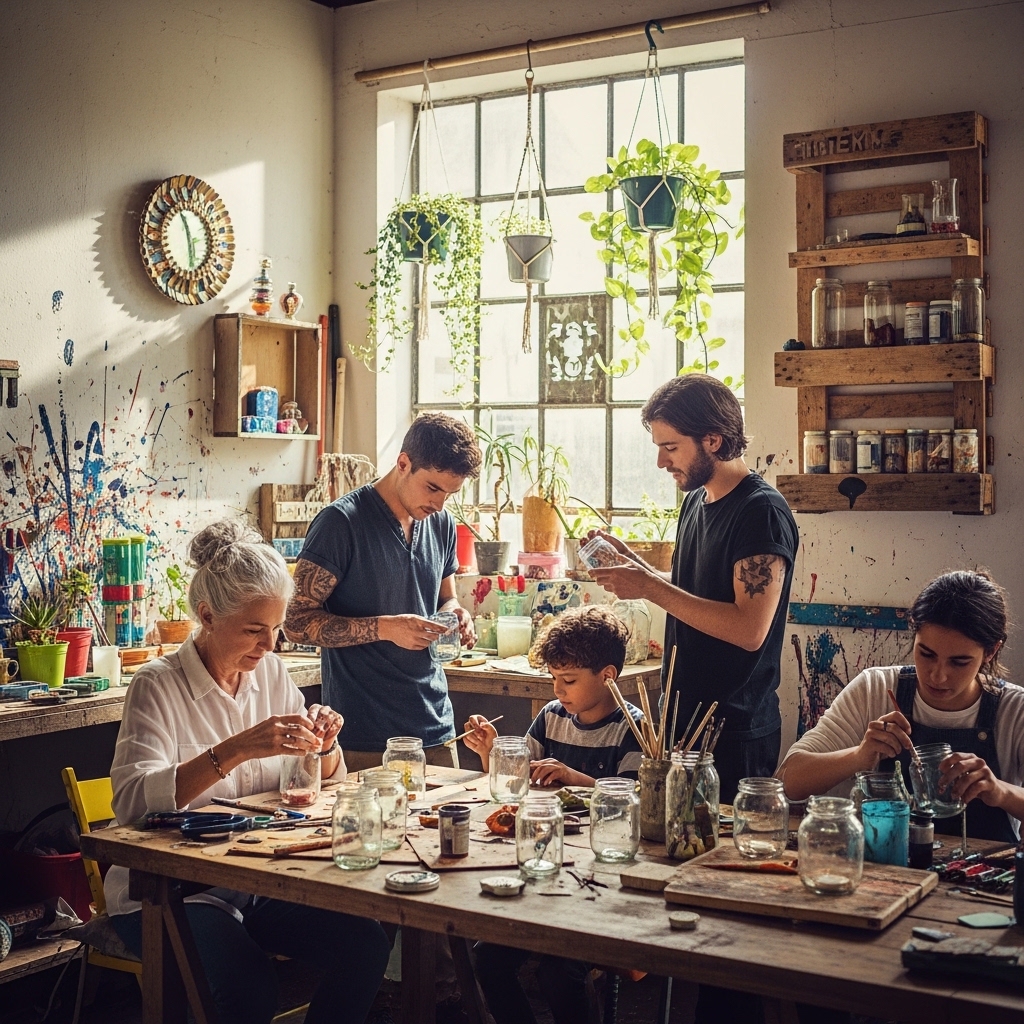
6. Craft Candle Holders from Upcycled Materials

Creating beautiful candle holders from upcycled materials is an excellent way to personalize your decor while promoting sustainability. These projects transform everyday items into stylish pieces that brighten your home.
Best Materials for Candle Holders
When selecting materials for your candle holders, consider the following options:
- Glass Bottles: Empty wine or soda bottles can easily become elegant candle holders.
- Teacups: Vintage or mismatched teacups add a touch of whimsy to your decor.
- Wood Scraps: Salvaged wood can be shaped into rustic candle holders.
- Plastic Bottles: A simple plastic bottle can be transformed with some paint and creativity.
- Tin Cans: Use empty cans to create industrial-style holders with a bit of drilling for ventilation.
These materials are not only cost-effective but also readily available in most households or thrift stores.
Safety Tips When Crafting
Safety is paramount when you work on upcycling projects. Follow these guidelines:
- Use a Cutting Mat: Protect your surfaces and yourself when cutting materials.
- Wear Gloves: Protect your hands from sharp edges or hot materials.
- Ventilation: Ensure good airflow, especially when painting or using adhesives.
- Fire Safety: Keep flammable materials away from open flames. Always use appropriate candle types to prevent overheating.
Decorative Ideas for Finished Holders
Once your candle holders are ready, consider these decorative ideas to enhance their appeal:
- Paint: Add a fresh coat of paint that matches your room’s color scheme.
- Embellishments: Wrap twine, lace, or ribbons around the holders for a charming touch.
- Themes: Create seasonal holders. For example, use autumn leaves for fall or snowflakes for winter.
- Grouping: Display multiple candle holders of varying heights together for visual interest.
By using these creative ideas, your upcycled candle holders can become stunning focal points in any room.
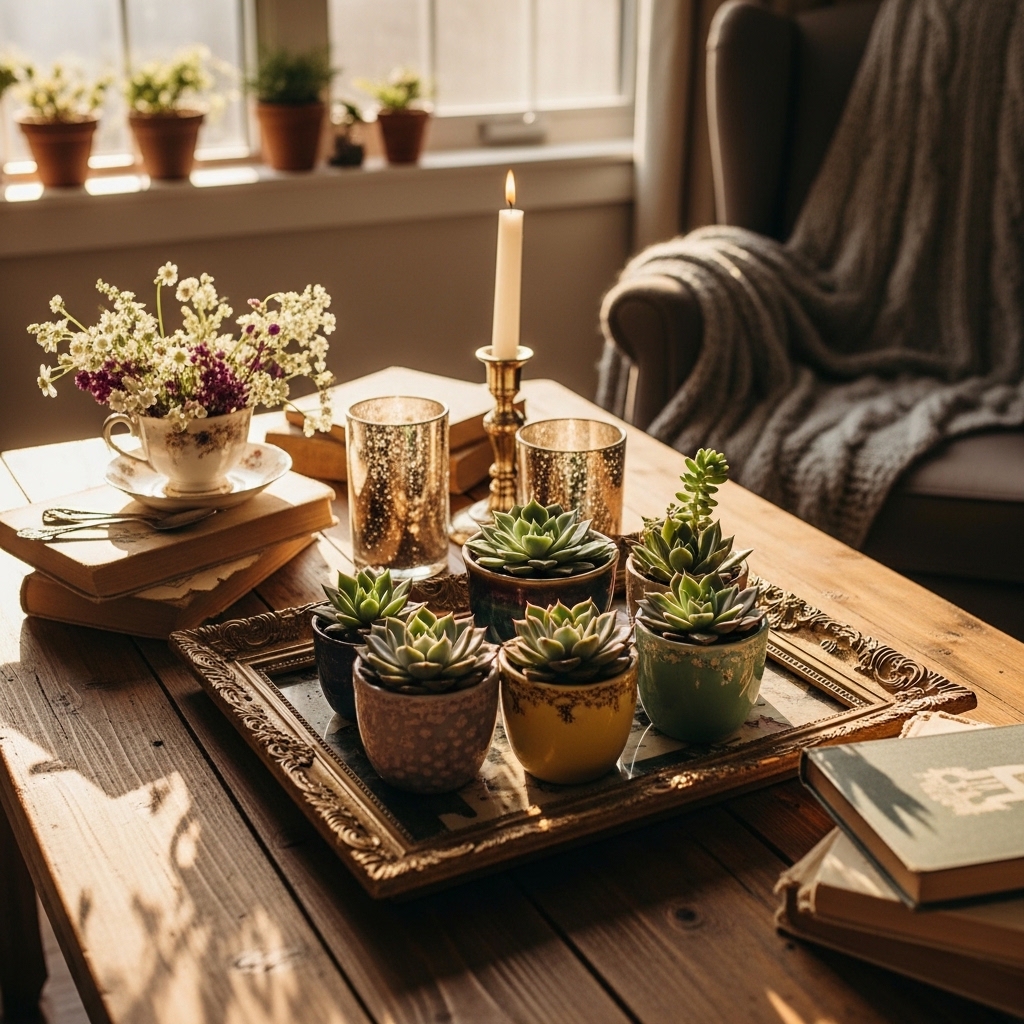
7. Create Planters from Old Containers
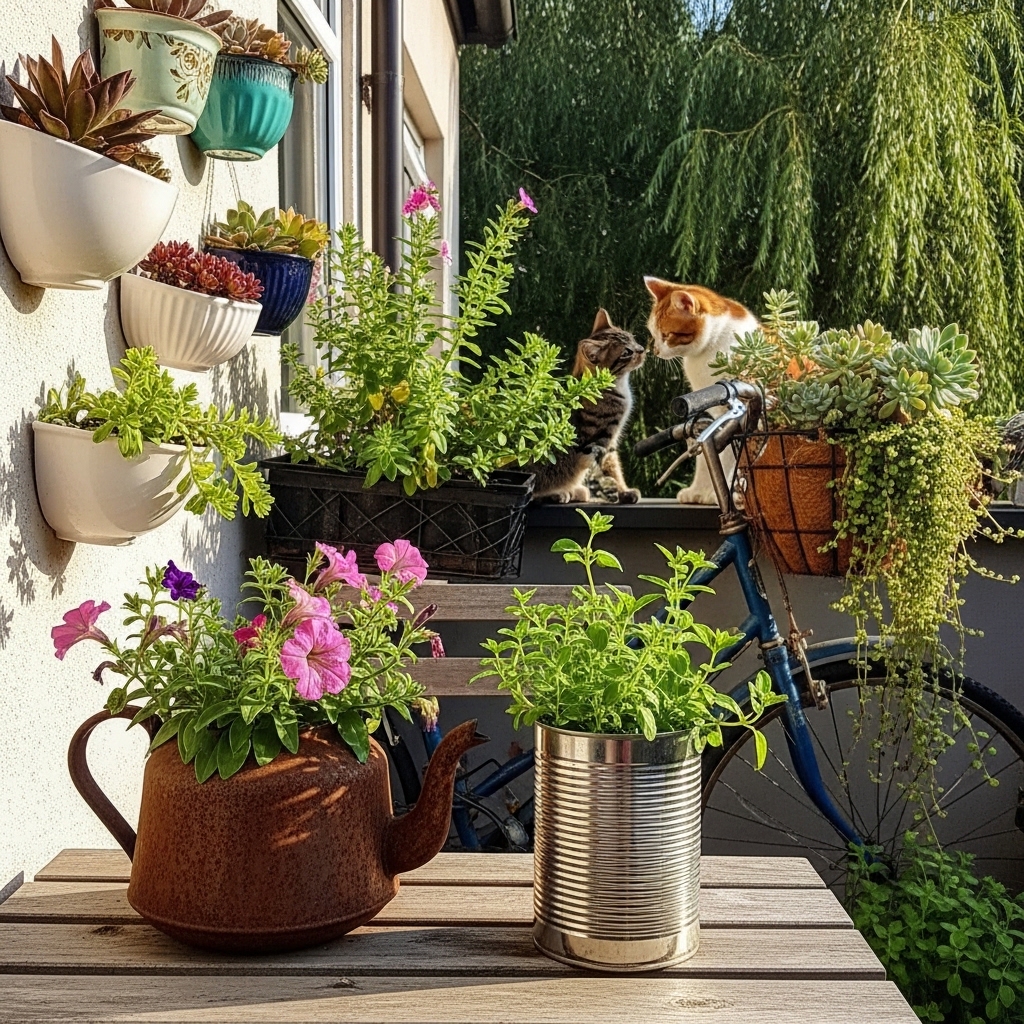
Upcycling discarded containers into planters offers a stylish and eco-friendly way to add greenery to your home. This DIY project not only repurposes everyday items but also enhances your decor.
Selecting Suitable Containers
Choose containers that suit your aesthetic and space. Here are some popular options:
- Tin Cans: Easy to paint and customize.
- Glass Jars: Perfect for herbs with a rustic touch.
- Old Boots or Shoes: Quirky and unique, they add character.
- Wooden Crates: Great for larger plants and herbs.
Ensure containers have drainage holes to prevent waterlogging. This is crucial for plant health.
Preparing Containers for Planting
Ready your containers for planting by following these steps:
- Clean: Remove any labels and wash thoroughly.
- Drill Holes: If not already present, add drainage holes using a drill or hammer.
- Add a Layer: Place small stones or gravel at the bottom to enhance drainage.
- Fill with Soil: Use quality potting mix tailored for container gardening [14].
Planting Ideas for Your Containers
Select plants that thrive in containers. Here are some ideas:
- Herbs: Basil, thyme, and mint grow well in smaller spaces.
- Succulents: They require minimal care and add a chic touch.
- Annual Flowers: Brighten your space with marigolds or petunias.
- Vegetables: Consider cherry tomatoes or peppers for a productive garden.
Maximize growth by positioning containers in sunlight and ensuring consistent watering. Rotate plants occasionally for even sunlight exposure.
By transforming discarded containers, you create beautiful decor while promoting sustainability. Each planter tells a story, providing a unique touch to your home.
8. Revive Old Mirrors into Decorative Pieces
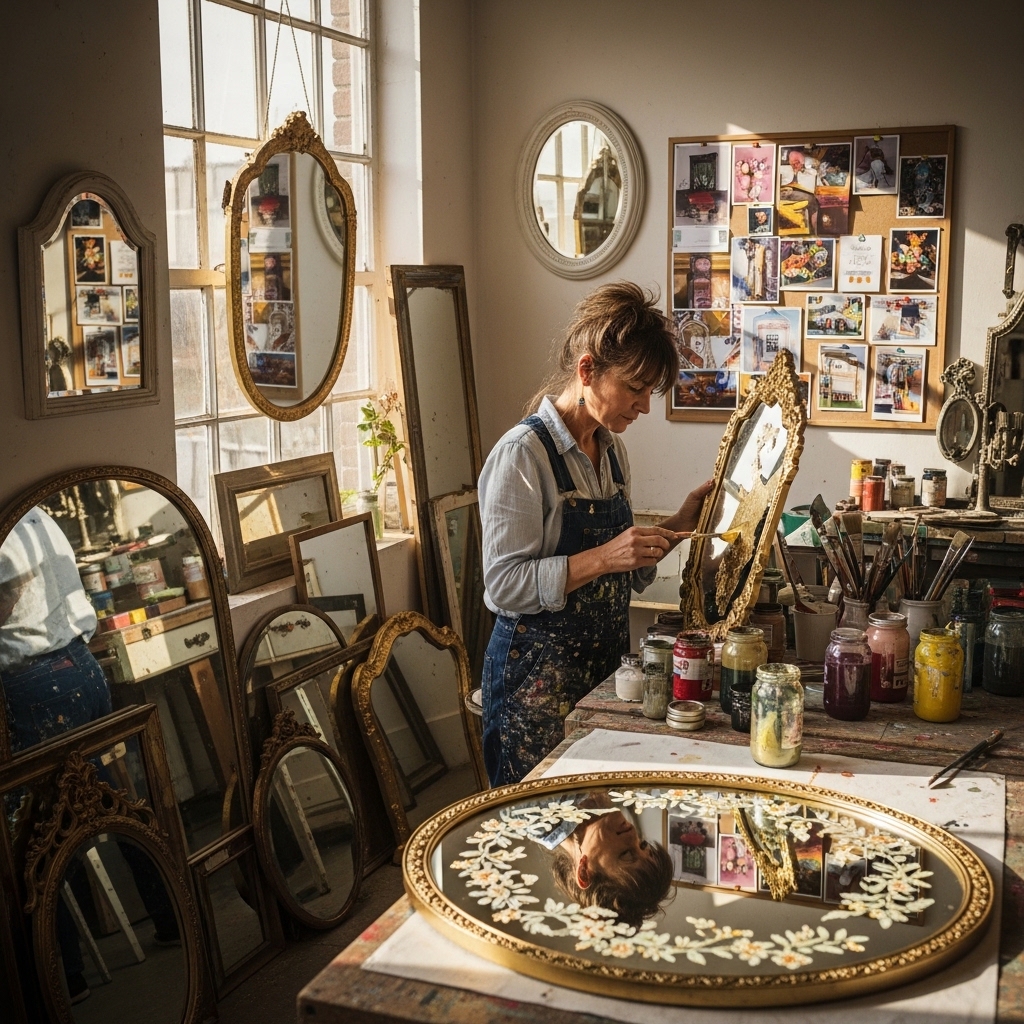
Transform old mirrors into stunning decor items. Upcycling mirrors not only enhances your space but also promotes sustainability. Here are some creative steps to breathe new life into your old mirrors.
Cleaning and Prepping Mirrors
Before starting, clean your mirrors thoroughly. Use glass cleaner to remove dust and grime. Ensure the mirror surface is scratch-free. Check the frame for any damage. Repair or paint the frame as needed. This prep work sets the stage for your design.
Ideas for Mirror Embellishments
Adding embellishments can elevate your mirror’s aesthetic. Consider these innovative techniques:
- Paint the Frame: Use bold colors or metallics to make a statement.
- Add Decorative Molding: Attach decorative trim for a classic look.
- Use Fabric or Wallpaper: Wrap the frame in fabric or wallpaper to match your decor style.
- Incorporate Nature: Attach dried flowers or twigs for a rustic vibe.
- Use Decoupage: Apply patterned paper for a unique touch.
These embellishments allow you to personalize your mirror, making it a focal point in any room.
Creative Ways to Display Mirrors
Displaying your upcycled mirrors creatively can amplify their impact. Here are some ideas:
- Gallery Wall: Arrange multiple mirrors of different sizes and shapes.
- Lean Against a Wall: Place a large mirror on the floor for a casual, chic look.
- Hang in Unexpected Places: Consider hanging mirrors in hallways, bathrooms, or entryways.
- Frame a Window: Position a mirror to reflect natural light into your space.
These display techniques not only highlight your creativity but also enhance the ambiance of your home. Upcycling mirrors into decor pieces enriches your living space while supporting eco-friendly practices[6][17][18].
9. Turn Vintage T-Shirts into Decorative Pillows
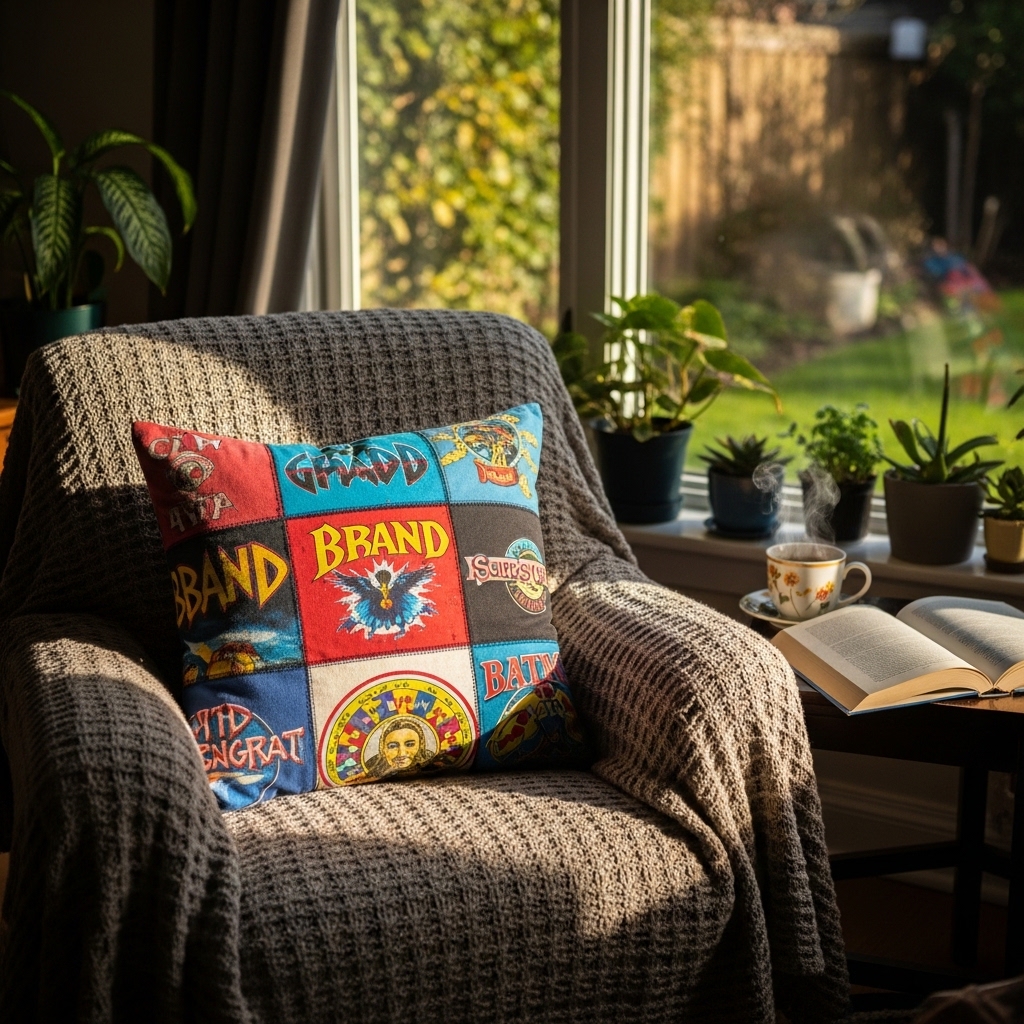
Transforming old T-shirts into decorative pillows is a fun and sustainable way to refresh your home decor. This upcycling project not only reduces waste but also adds a personal touch to your living space.
Selecting the Right T-Shirts
Choose T-shirts that hold sentimental value or bold graphics. Consider the following factors:
- Condition: Ensure the fabric is intact without major tears or stains.
- Design: Look for vibrant colors or unique prints that will stand out.
- Size: Larger shirts can create bigger pillows, while smaller ones can be combined for a themed collection.
Techniques for Pillow Assembly
Once you have your T-shirts, follow these steps to assemble your pillows:
- Cut the T-Shirts: Cut both front and back into equal squares or rectangles.
- Sew the Edges: Place the two pieces together, inside out, and sew around the edges, leaving a gap for stuffing.
- Stuff the Pillow: Use eco-friendly stuffing options like old fabric scraps or recycled cotton to fill the pillow.
- Finish the Pillow: Sew the gap closed, turning the pillow right side out.
Decorating Your Pillows
Enhance your T-shirt pillows with additional decorative elements:
- Embellishments: Add buttons, fabric paint, or patches for a unique flair.
- Themed Collections: Create a series of pillows using T-shirts from specific events, such as concerts or vacations.
- Layering: Mix different shapes and sizes to create an eclectic look on your couch or bed.
This project exemplifies the essence of upcycling. By turning forgotten T-shirts into functional decor, you not only reduce textile waste but also bring a personal touch to your home[19]. Decorative pillows are popular choices for home furnishing, making your space both stylish and sustainable[20].
10. Create Rustic Wood Signs from Scrap Wood

Rustic wood signs add personality and charm to any space. Using scrap wood, you can create unique decor that showcases your creativity and sustainability.
Choosing the Right Scrap Wood
Select wood that is sturdy and visually appealing. Look for discarded pallets, fence boards, or leftover lumber. Each piece tells a story, making your sign one-of-a-kind. Consider the following tips:
- Condition: Choose wood without extensive rot or damage.
- Texture: Look for interesting grain patterns or weathered finishes.
- Size: Ensure the wood is large enough for your design.
Techniques for Lettering
Lettering brings your rustic sign to life. Choose techniques that match your style. Here are a few popular options:
- Stenciling: Use stencils for clean, precise letters. This is perfect for beginners.
- Hand Painting: Brush paint directly for a personal touch. Experiment with different fonts.
- Burning: Wood burning creates a rustic and durable finish. It works well for intricate designs.
Ideas for Sign Designs
Let your imagination soar with these design ideas:
- Welcome Signs: Perfect for entryways, create a warm invitation.
- Inspirational Quotes: Display favorite sayings to uplift spirits.
- Directional Signs: Point guests to different rooms or areas in your home.
- Seasonal Decor: Change designs to reflect holidays or seasons.
When creating your rustic signs, remember to apply a protective finish. This ensures longevity and keeps your artwork looking fresh. You can use clear varnish or wood oil to enhance the wood’s natural beauty while providing a layer of protection.
For lettering, consider using chalk paint for easy updates. It allows for a distressed look and can be easily changed with a simple coat of paint. This adaptability makes your sign a versatile piece of decor.
Overall, crafting rustic wood signs from scrap wood not only beautifies your home but also promotes a sustainable lifestyle by repurposing materials.
11. Upcycle Tin Cans into Lanterns

Transforming tin cans into lanterns is a fun and eco-friendly project. This DIY upcycling idea not only adds charm to your decor but also repurposes items you might otherwise throw away.
Preparing Your Tin Cans
- Gather Materials: Collect empty tin cans, a hammer, nails, a bowl of water, and a freezer.
- Freeze the Cans: Fill each can with water and freeze overnight. This will help maintain the can’s shape while you work on it.
- Remove Ice: Once frozen solid, remove the ice by running the can under warm water for a few seconds.
Techniques for Creating Patterns
- Design Ideas: Use a hammer and nails to punch holes into the can. Create simple shapes like stars, hearts, or floral patterns.
- Layering Techniques: For a more complex design, layer multiple patterns. This adds depth and visual interest.
- Safety First: Always wear safety gloves. Sharp edges can cause cuts during this process.
Adding Lighting Elements Safely
- Choose Your Light Source: Use LED tea lights for safe indoor use. These mimic the glow of real candles without the fire risk [23].
- Placement: Carefully place the light inside the can. Ensure it sits securely and won’t tip over.
- Decorate Further: Consider painting the outside of the can with non-toxic paint for added flair.
By upcycling tin cans into lanterns, you embrace sustainability while enhancing your home’s aesthetics. This project encourages creativity and resourcefulness, making it a perfect addition to your upcycled home decor collection [9].
12. Reuse Old Books as Decorative Items

Upcycling old books transforms them into distinctive decor pieces. These repurposed items add character and charm to any room. Here are some creative ways to give new life to old books.
Selecting Books for Upcycling
Choose books that resonate with your aesthetic. Look for:
- Vintage Editions: Their worn covers and yellowed pages exude charm.
- Colorful Spines: Create a vibrant display on shelves.
- Themed Collections: Focus on a particular genre to maintain consistency.
When selecting, consider the condition of the book. Avoid books with significant damage unless you plan to use them for crafts.
Creative Display Ideas
Incorporate old books into your decor in various ways:
- Stacked Displays: Use books as pedestals to elevate decorative items like plants or candles.
- Wall Art: Frame pages or covers and hang them as art pieces. This approach allows you to showcase literary quotes or beautiful illustrations.
- Book Page Garlands: Cut pages into shapes and string them together for a whimsical decoration.
Techniques for Book Modifications
Get creative with modifications to enhance the appeal of old books:
- Bookends: Use heavy items or create custom bookends from upcycled materials to hold your displays.
- Altered Books: Transform the pages into art by painting or collaging them. This method allows you to express your creativity while preserving the book’s essence.
- Repurposed Book Covers: Turn covers into decorative trays or wall decor by adding a layer of sealant for durability.
By reimagining old books, you create unique decor items that reflect your personality. This approach not only beautifies your space but also promotes sustainable living by reducing waste. Embrace the charm of old books in your upcycled home decor projects!
13. Craft a Unique Coffee Table from Old Doors
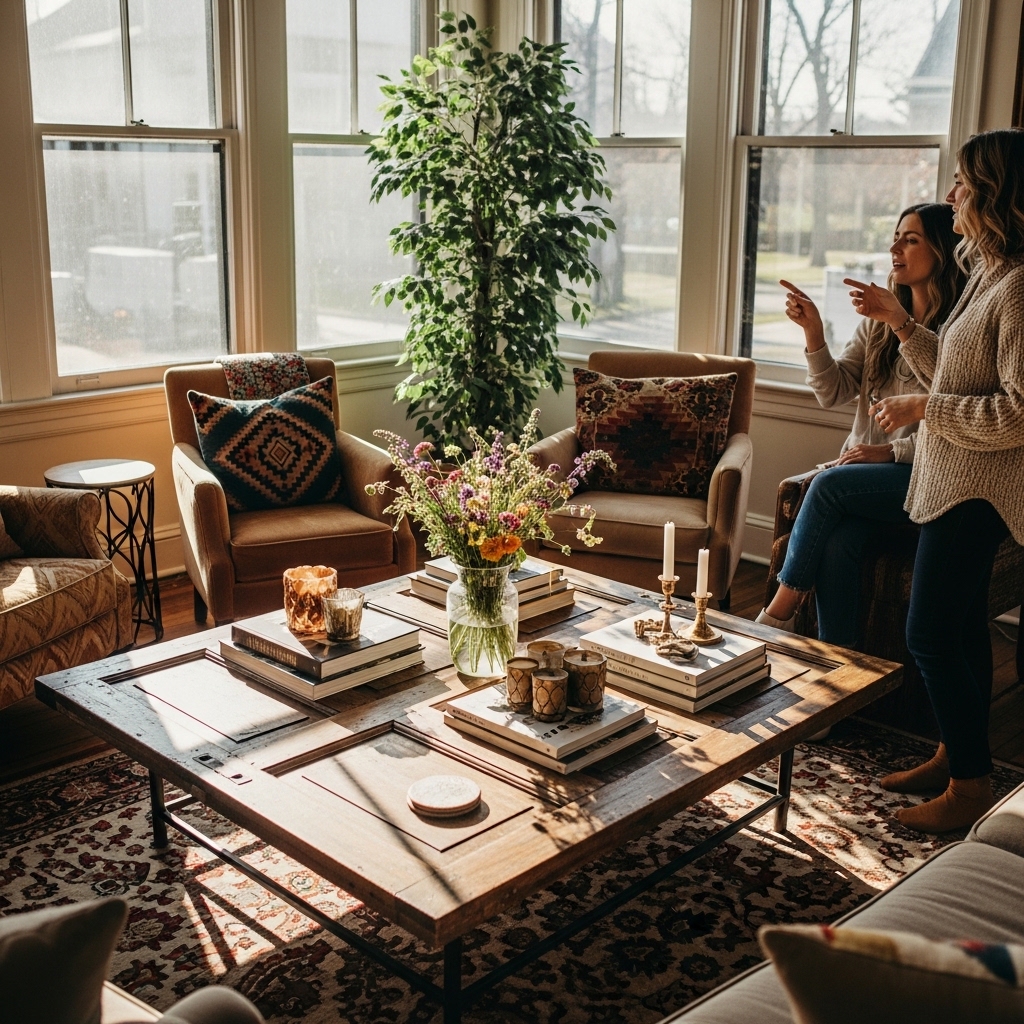
Transforming old doors into coffee tables is a creative way to add character to your living space. This upcycling project is both budget-friendly and sustainable, giving new life to discarded materials.
Preparing the Door for Use
- Select the Right Door: Look for solid wood doors as they provide durability and a rustic look. Avoid hollow-core doors; they lack strength.
- Clean and Sand: Remove any hardware. Clean the door thoroughly, then sand it down to eliminate rough edges and prepare the surface for finishing.
- Repurpose Hardware: Consider reusing hinges or knobs as decorative elements in your design.
Leg Options for Stability
- Furniture Legs: Attach pre-made furniture legs for a clean, modern look. Choose metal or wood to complement your decor style.
- Pallets or Crates: Use wooden pallets or crates as a base. This method adds height and character while keeping costs low.
- DIY Legs: Create custom legs from leftover wood scraps. This allows you to personalize the height and style of your coffee table.
Finishing Touches for Aesthetics
- Paint or Stain: Apply a coat of paint or stain to enhance the door’s natural beauty. Choose colors that fit your interior design.
- Add a Glass Top: For a sleek finish, place a cut-to-size glass top on the door. This makes cleaning easier and adds a modern touch.
- Decorative Elements: Incorporate decorative items like books, trays, or plants to personalize your coffee table. This not only beautifies the table but also makes it functional.
This project not only turns a discarded door into a functional piece but also embodies the principles of sustainability. By repurposing an old door, you create a unique coffee table that sparks conversations and showcases your creativity in home decor.
14. Transform Broken Furniture into Art
Broken furniture can become stunning art pieces with a little creativity. Instead of tossing out old chairs or tables, consider how they can serve a new purpose in your home decor.
Finding the Right Pieces
Look for furniture that has character. Broken chairs, old dressers, and damaged tables can all be transformed. The key is to select pieces that resonate with your style. Consider:
- Chairs with unique shapes: They can be turned into wall decor or repurposed as plant holders.
- Tables with interesting surfaces: These can be cut down or painted to create new art displays.
- Dressers with removable drawers: These can be converted into shadow boxes for displaying collectibles.
Techniques for Assembling Art
Use various methods to breathe life into broken furniture. Here are some techniques:
- Collage Ideas: Combine different parts from multiple broken pieces. For instance, attach the legs of a table to the back of a chair to create a unique wall-mounted shelf.
- Painting and Texturing: Use chalk paint or textured finishes to add depth. This not only revives the piece but also creates a contemporary feel.
- Layering: Stack different furniture elements to create multi-dimensional art. For example, layer a chair seat over a dresser top for an intriguing visual effect.
Displaying Your Art Pieces
Showcase your upcycled furniture art effectively. Here are some tips:
- Choose the Right Location: Hang wall art at eye level. Position larger pieces in well-lit areas to draw attention.
- Create a Gallery Wall: Mix different upcycled items with traditional art for an eclectic display. Use frames to unify the look.
- Incorporate Lighting: Use spotlights or fairy lights to highlight your creations. This adds warmth and enhances the artistic vibe of your home.
Transforming broken furniture into art not only showcases your creativity but also champions sustainability. Upcycling reduces waste and gives new life to forgotten items, making your home decor both stylish and eco-friendly [6].
15. Upcycle Wine Bottles into Decorative Pieces
Transform your empty wine bottles into stunning decorative pieces. This simple upcycling project allows you to create unique home decor while promoting sustainability.
Preparing Wine Bottles for Upcycling
Start with clean, empty wine bottles. Remove labels and residue using warm soapy water or a soaking method. Ensure the bottles are completely dry before proceeding. Consider safety when cutting bottles; always wear protective gear like gloves and goggles. Use a glass cutter for clean edges, and follow safety guidelines to avoid accidents.
Techniques for Transforming Bottles
There are various methods to upcycle wine bottles into decor:
- Candle Holders: Insert tapered candles into the neck of a bottle. For a personal touch, paint or wrap the bottle in twine. This creates an elegant ambiance for dining areas [1][4].
- Vases: Clean bottles can be painted or left clear. Fill them with fresh flowers or fairy lights for a striking centerpiece [2][7]. Group bottles of different heights for added visual interest.
- Decorative Lighting: Drill a hole in the base and insert LED string lights. This creates a glowing feature that enhances any room’s atmosphere [6].
Decorating Your Finished Pieces
Once your bottles are transformed, focus on styling:
- Color Coordination: Choose colors that match your decor theme. Use spray paint, fabric, or natural elements like jute to enhance aesthetics.
- Layering: Combine different bottle sizes and shapes for a dynamic display. Place them on shelves, tables, or as part of a gallery wall.
- Seasonal Decor: Change the contents of your bottles with the seasons. Use dried flowers in fall, or twinkling lights during holidays for a festive touch.
By reimagining wine bottles, you not only create beautiful decor but also contribute to eco-friendly living. Embrace your creativity and let your upcycled pieces shine!
16. Create Unique Garden Decor from Old Tools
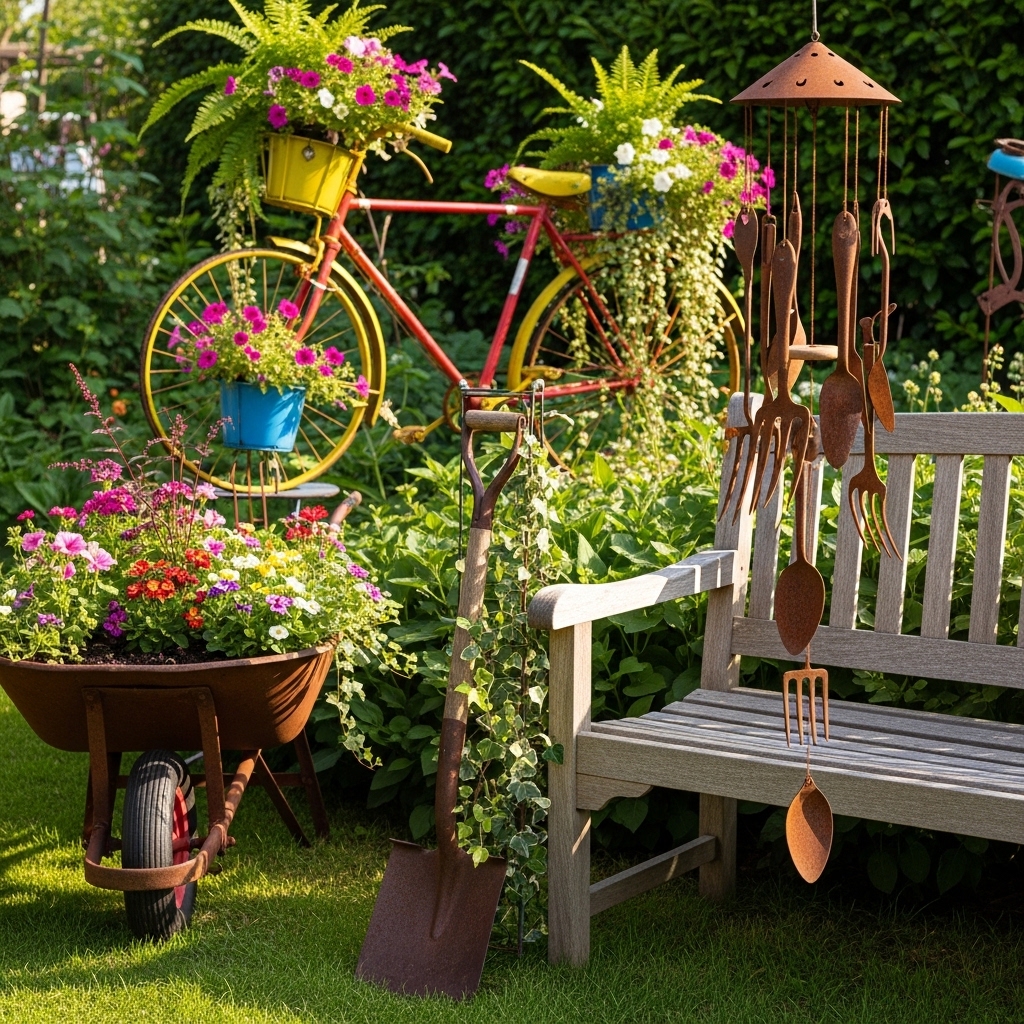
Transforming old garden tools into decor can add charm and personality to your outdoor space. This upcycling approach not only repurposes items but also showcases your creativity.
Choosing Tools for Decor
Select old tools that have character. Look for:
- Rusty shovels or hoes
- Vintage rakes
- Worn-out watering cans
- Old pitchforks
These items can serve as statement pieces. Their wear tells a story while enhancing your garden’s aesthetic.
Techniques for Preparing Tools
Before using old tools, prepare them properly. Clean them thoroughly to remove dirt and rust. You can:
- Sand the surfaces to smooth rough edges.
- Apply a protective sealant to prevent further rusting.
- Paint them in vibrant colors for a fresh look.
These steps ensure your decor lasts and looks appealing.
Ideas for Functional Garden Displays
Here are creative ways to display your upcycled tools:
- Tool Planters: Use old watering cans or shovels as planters. Fill them with soil and colorful flowers or herbs. This adds life and color to your garden.
- Garden Art: Hang old rakes or shovels on walls or fences. Arrange them in artistic patterns. This creates visual interest without taking up space.
- Decorative Statements: Position a vintage pitchfork upright in the ground. Attach small pots to its tines for a quirky, functional display.
Old tools can serve more than just their original purpose. They can enhance your garden’s beauty while reflecting your unique style.
17. Upcycle Old Shoes into Planters
SBAG_IMG_19d34eac578110a7d5c
Transform your old shoes into delightful planters. This creative project adds personality to your garden while promoting sustainability.
Selecting Suitable Shoes
Start by choosing shoes with sturdy materials. Look for:
- Old boots
- Sneakers
- High-tops
These options provide ample space for soil and plants. Ensure they have drainage holes. If not, create holes with a drill for proper water flow.
Preparing Shoes for Planting
Clean your selected shoes thoroughly. Remove any dirt or debris. Next, follow these steps:
- Add Drainage: Place small rocks or gravel at the bottom.
- Fill with Soil: Use a quality potting mix for best results.
- Choose Plants: Consider hardy plants like succulents, herbs, or annual flowers.
These choices thrive in confined spaces, ensuring your shoe planters remain vibrant.
Decorating Your Shoe Planters
Enhance your shoe planters with creative touches. Here are some ideas:
- Paint the Shoes: Use outdoor-friendly paint for a fun splash of color.
- Add Labels: Use wooden stakes to label each plant.
- Incorporate Accessories: Add decorative stones or small figurines for added charm.
For themed gardens, match shoe colors with the surrounding decor. Quirky designs can transform an ordinary garden into a whimsical retreat.
Best Plants for Shoe Planters
Select plants that suit small spaces. Here’s a quick list:
- Succulents: Low maintenance and drought-tolerant.
- Herbs: Basil, mint, and chives add fragrance and utility.
- Flowers: Petunias or marigolds provide vibrant color.
This project not only beautifies your space but also gives new life to worn-out footwear, turning them into unique decor pieces that reflect your style.
18. Create Decorative Coasters from Old CDs
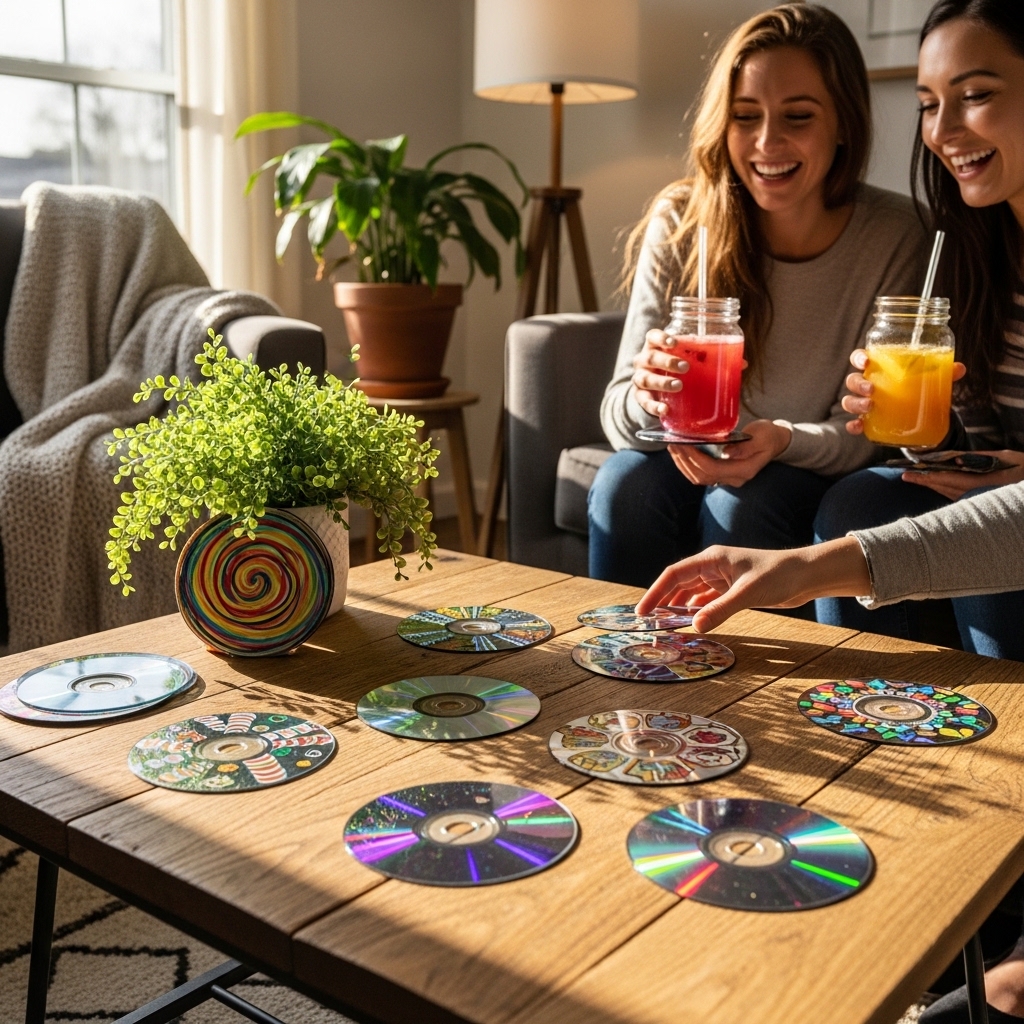
Transforming old CDs into decorative coasters is a fun and creative upcycling project. Not only do you repurpose materials that would otherwise contribute to waste, but you also create unique decor items for your home.
Choosing Old CDs for Coasters
When selecting old CDs for this project, consider the following:
- Condition: Choose CDs that are not scratched or damaged. The smoother the surface, the better.
- Design: Look for CDs with interesting artwork or colors. This will enhance the visual appeal of your coasters.
- Size: Standard CDs work best, but you can also use mini CDs for smaller coasters.
Techniques for Decorating CDs
You can personalize your coasters in various ways. Here are some ideas:
- Paint: Use acrylic paint to add designs or patterns. You can create seasonal themes or abstract art.
- Decoupage: Apply fabric or decorative paper using decoupage glue. This adds texture and color.
- Stickers: Use vinyl or paper stickers for a quick and easy design. Choose designs that match your decor style.
Sealing Your Coasters for Longevity
To protect your coasters and ensure they last, sealing is essential. Follow these steps:
- Apply a Sealant: Use a clear acrylic spray or Mod Podge for protection. This prevents moisture damage.
- Let it Dry: Allow the sealant to dry completely before using the coasters.
- Test for Durability: Check that the finish withstands spills and heat before regular use.
By choosing unique designs and effectively sealing your coasters, you create functional art pieces that reflect your personal style. This upcycling project not only reduces waste but also adds flair to your home decor [3][30][31].
19. Upcycle Old Silverware into Decorative Hooks
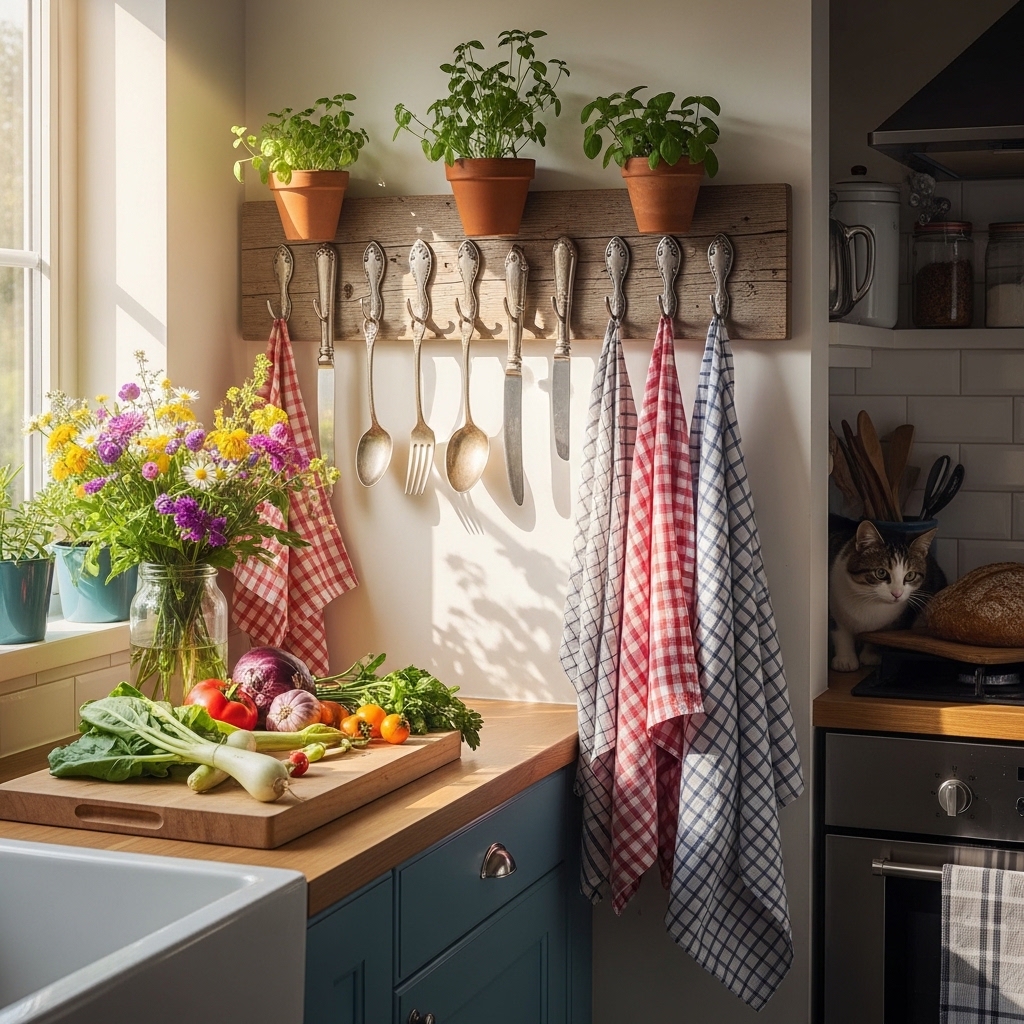
Transforming old silverware into stylish hooks adds a unique touch to your home decor. This project combines creativity with functionality, allowing you to repurpose items that would otherwise go to waste.
Selecting the Right Silverware
Choose old silverware with interesting shapes. Forks, spoons, and knives each offer unique designs. Look for items that are sturdy enough to hold weight. Thrift stores or yard sales are excellent places to find these treasures.
Techniques for Bending and Shaping
Once you have your silverware, it’s time to shape it into hooks.
- Heat the Silverware: Use a heat gun or torch to make the metal pliable.
- Bend with Care: Use pliers to shape the silverware into a hook. Start with a gentle curve, then adjust as needed.
- Smooth Edges: Sand any sharp edges for safety. This will prevent injuries when handling the hooks.
Mounting Your Hooks Securely
For functional and safe use, proper installation is crucial.
- Choose the Right Mounting Surface: Wooden boards or walls work best.
- Use Appropriate Hardware: Use wall anchors if mounting directly onto drywall. For heavier items, opt for screws that penetrate wall studs.
- Test for Stability: Once mounted, ensure the hook can hold weight without bending or breaking.
Innovative Design Ideas
Consider these creative ideas for using your silverware hooks:
- Entryway Organization: Use them to hang keys, bags, or hats.
- Kitchen Decor: Install them to hold kitchen towels or utensils.
- Garden Charm: Place them on fences to hang garden tools or decorations.
By transforming old silverware into decorative hooks, you not only add functionality to your space but also promote sustainability through upcycling. This project exemplifies how repurposing everyday items can create unique, stylish decor that reflects your personality while reducing waste [3][32].
20. Create a Pet Bed from an Old Suitcase
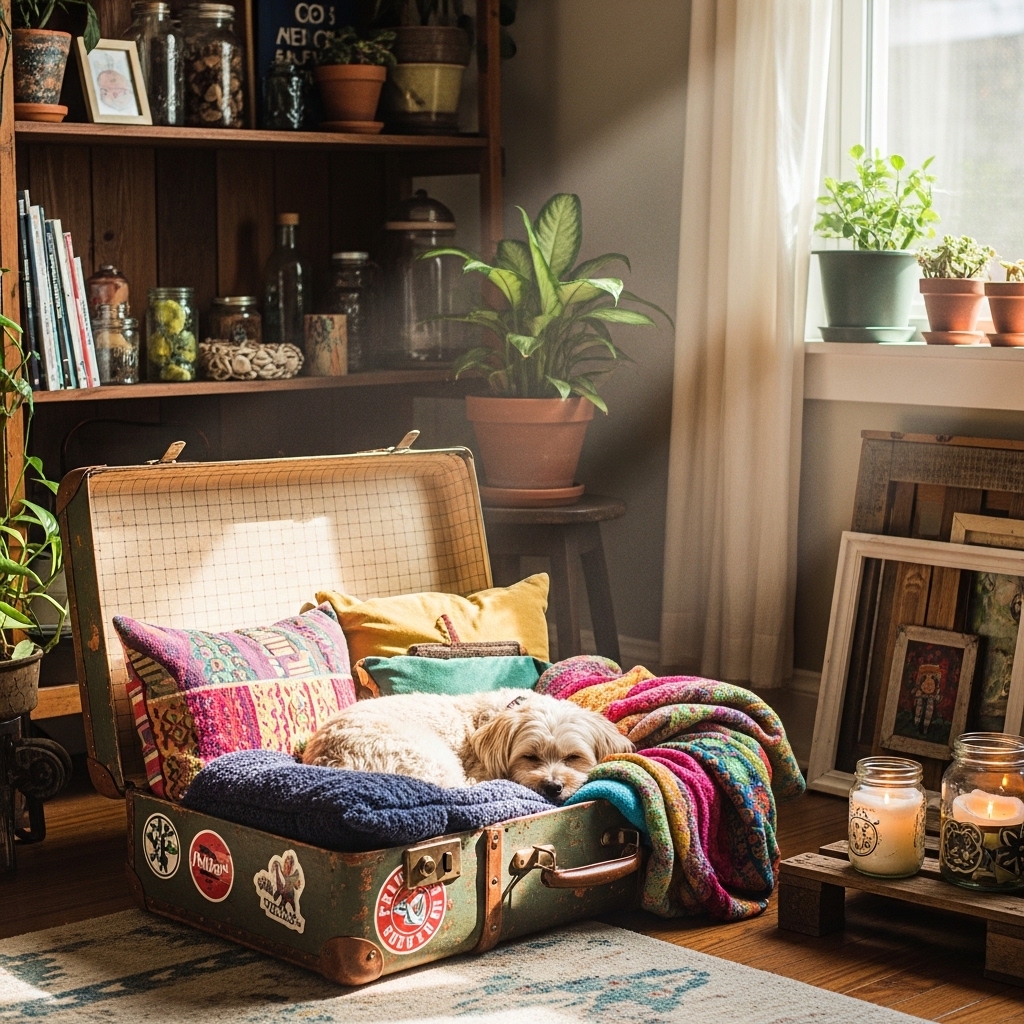
Upcycling an old suitcase into a pet bed combines creativity with sustainability. This project not only provides a cozy spot for your furry friend but also adds a unique, vintage touch to your home decor.
Choosing the Right Suitcase
When selecting a suitcase, consider these elements:
- Size: Ensure it’s large enough for your pet to comfortably lie down.
- Condition: Look for a suitcase without major damage, as this will affect durability.
- Style: Choose a design that complements your home’s aesthetic.
Preparing the Interior for Pets
Transforming the suitcase into a pet bed involves several steps:
- Clean the Suitcase: Remove any dust or debris to create a safe environment for your pet.
- Add Legs (Optional): Attach sturdy legs for elevation, making it easier for your pet to enter and exit.
- Line the Interior: Use soft fabrics for lining. You can opt for fleece, cotton, or repurposed blankets to create a comfortable sleeping area. Ensure that the materials are washable for easy maintenance.
Decorating the Pet Bed
Personalize the pet bed to reflect your pet’s personality:
- Paint: A fresh coat of paint can bring the suitcase to life. Use non-toxic, pet-safe paint.
- Pillows: Add decorative pillows or cushions for extra comfort and style.
- Stenciling: Consider stenciling your pet’s name on the exterior for a custom touch.
This project not only repurposes an unused suitcase but also allows you to showcase your creativity in home decor. Plus, it contributes to sustainability by preventing waste [34][35]. With these steps, you create a unique pet bed that merges functionality with charm, enhancing your living space while providing comfort to your beloved pet.
21. Upcycle Old Tires into Garden Furniture
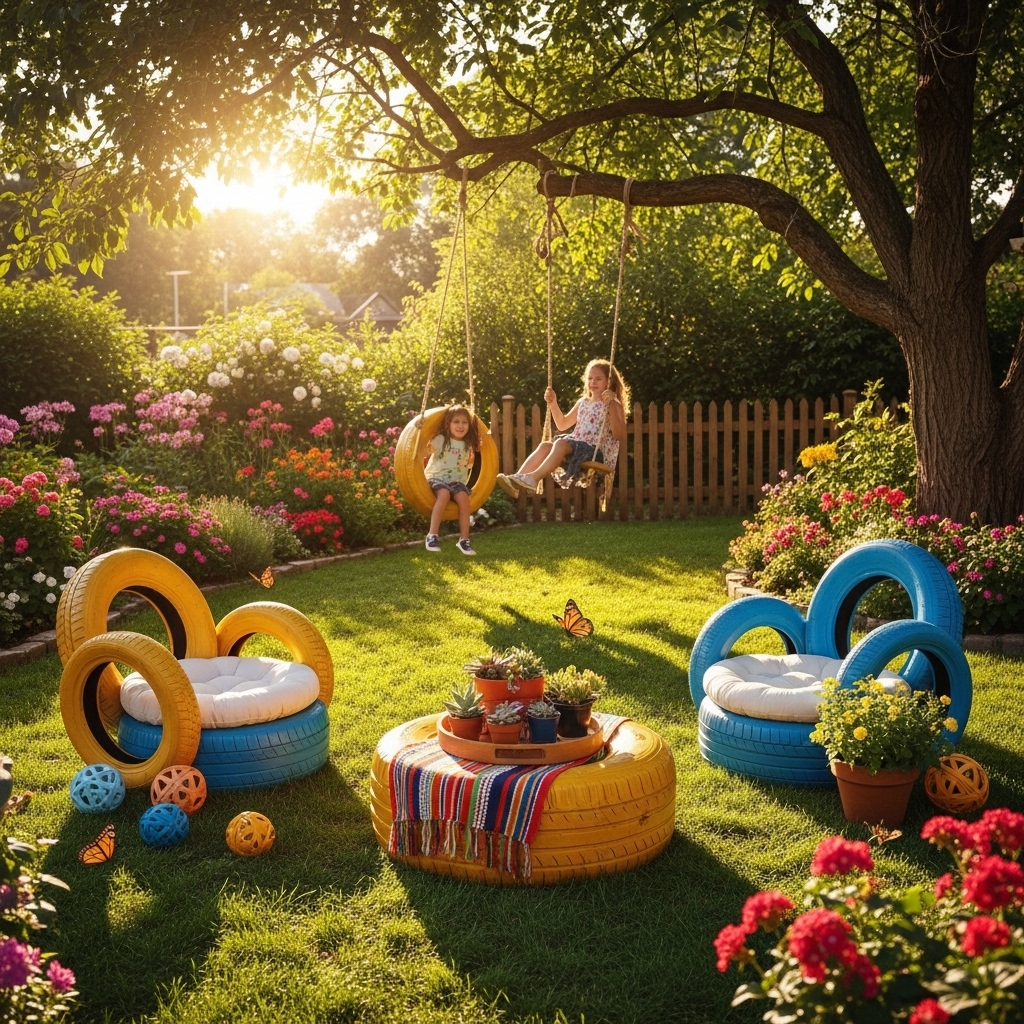
Transforming old tires into functional garden furniture elevates your outdoor space while promoting sustainability. This creative project not only reduces waste but also offers unique, stylish pieces for your garden.
Preparation and Cleaning of Tires
Before you start, gather your materials. You will need:
- Old tires
- Soap and water
- A scrub brush
- Sandpaper (optional)
- Primer (for painting)
- Clean the Tires: Wash the tires with soap and water. Remove dirt and debris to ensure a clean surface for painting or finishing.
- Inspect for Damage: Check for any cracks or significant wear. Choose tires that are in good condition.
- Sanding: If you plan to paint the tires, lightly sand the surface. This helps the paint adhere better.
Ideas for Furniture Creations
Old tires can be transformed into various garden furniture items. Here are some inspiring ideas:
- Tire Benches: Stack two or three tires and secure them. Add a wooden or cushioned top for comfort.
- Coffee Tables: Place a glass top on a single tire. Decorate it with plants or magazines for added style.
- Seating: Use tires as bases for outdoor chairs. Add cushions for comfort and flair.
- Planters: Cut a tire in half and fill it with soil for a rustic planter.
These creations blend functionality and art, making your garden more inviting.
Finishing Touches for Aesthetics
To enhance the visual appeal of your tire furniture, consider these finishing touches:
- Painting: Use non-toxic outdoor paint to add color. Choose bright shades for a playful look or muted tones for elegance.
- Stenciling: Personalize your pieces with stenciled designs or patterns.
- Cushions: Add outdoor cushions for comfort. Choose weather-resistant fabrics to ensure durability.
By employing these innovative ideas, you can create attractive furniture while maximizing space and functionality in your garden. Upcycling tires not only benefits the environment but also showcases your creativity in home decor.
22. Craft Unique Jewelry from Upcycled Materials
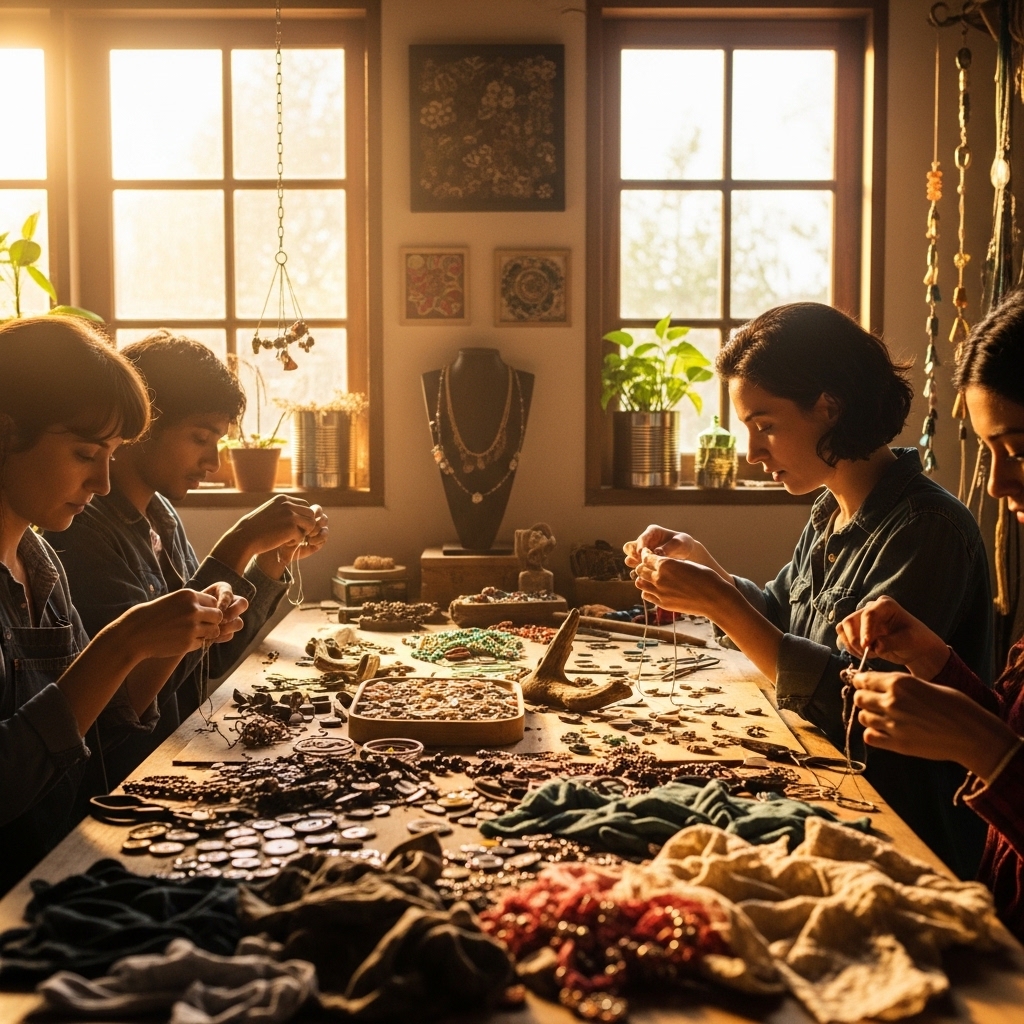
Transforming old materials into jewelry allows you to express your creativity while promoting sustainability. With a few simple techniques, you can create stunning pieces that reflect your personal style.
Selecting Suitable Materials for Jewelry
Start by sourcing materials that have character. Here are some excellent options:
- Broken jewelry: Use old necklaces or earrings for new designs.
- Buttons: Vintage buttons can add unique flair.
- Fabric scraps: Repurpose fabric from old clothes for a soft touch.
- Natural elements: Incorporate stones, twigs, or shells for an organic feel.
When choosing materials, consider their durability and aesthetic appeal. Look for items that can withstand wear while showcasing your individuality.
Techniques for Crafting Jewelry
Implement various crafting techniques to enhance your upcycled jewelry. Here are some popular methods:
- Wire wrapping: Use wire to create intricate designs around stones or beads.
- Beading: String together beads from old jewelry or thrift finds for necklaces or bracelets.
- Resin casting: Encapsulate smaller items in resin for a modern, glossy finish.
- Sewing: Stitch fabric scraps into unique earrings or brooches.
Experiment with different techniques to find what resonates with your style. Each method brings its own charm to your creations.
Ideas for Personalizing Your Pieces
Personalization adds a unique touch to your jewelry. Consider these ideas:
- Engraving: Personalize metal pieces with initials or meaningful dates.
- Color themes: Choose colors that represent your personality or favorite season.
- Layering: Combine multiple pieces for a trendy, stacked look.
- Storytelling: Select materials that reflect significant experiences, like travel souvenirs.
By personalizing your jewelry, you create pieces that tell a story and resonate with your identity. Each item can become a conversation starter, showcasing your creativity and commitment to sustainability.
Explore your creativity by crafting unique jewelry from upcycled materials. Your designs can reflect personal stories and contribute positively to the environment.
23. Upcycle Old Fabrics into Quilts
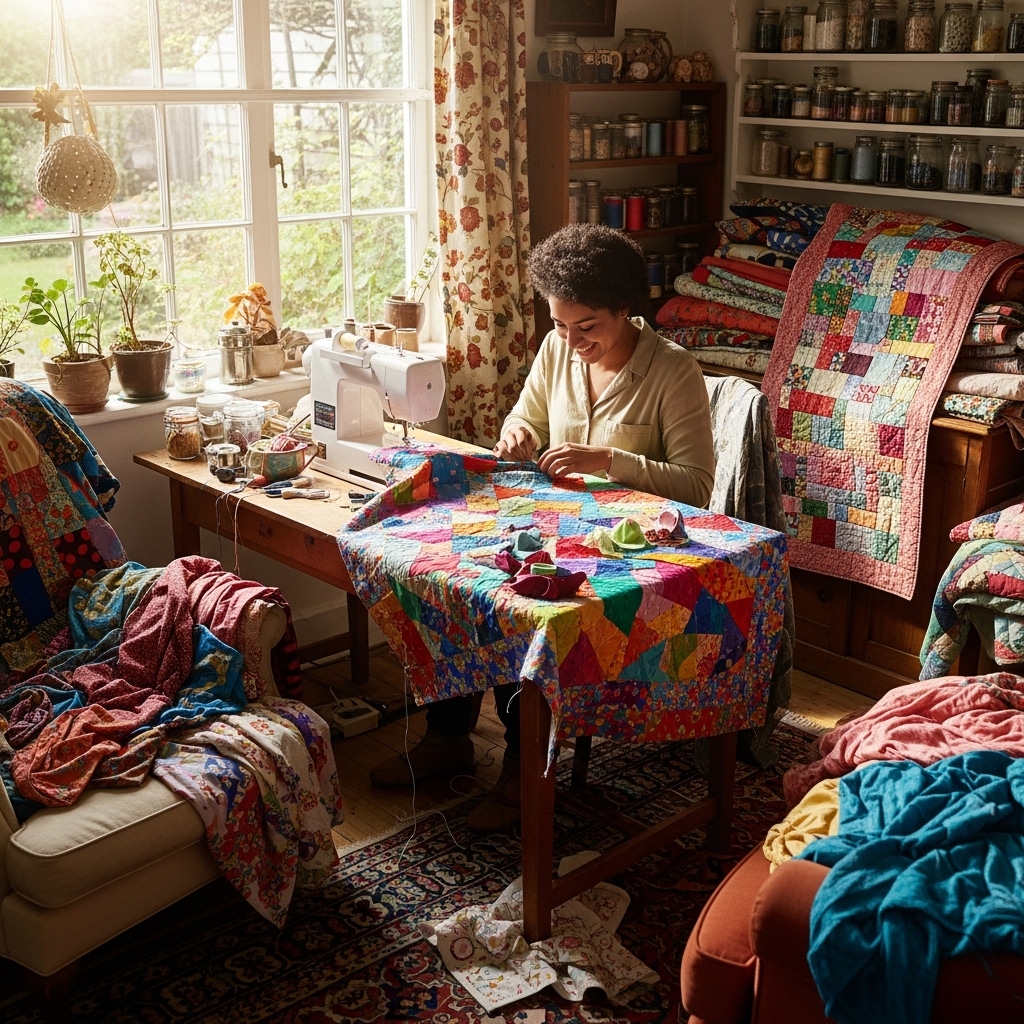
Transforming old fabric pieces into cozy quilts is a fulfilling way to repurpose unused textiles. This project not only reduces waste but also allows you to create a functional art piece that tells a story.
Choosing the Right Fabrics
Select a variety of old fabrics, such as shirts, dresses, or even tablecloths. Look for:
- Colorful patterns: Mix and match vibrant designs for a playful quilt.
- Textures: Combine smooth and rough fabrics to add depth.
- Sentimental pieces: Incorporate fabrics with personal history for a unique touch.
Sewing Techniques for Quilts
Once you have your fabrics, use these sewing techniques to create your quilt:
- Preparation: Wash and iron fabrics to remove wrinkles and shrinkage.
- Cutting: Cut fabric into squares or rectangles, typically 5×5 inches or 10×10 inches.
- Piecing: Sew pieces together using a straight stitch. Use a 1/4 inch seam allowance for consistency.
- Layering: Layer the quilt top, batting, and backing fabric. Pin them together to prevent shifting.
- Quilting: Quilt through all layers using a sewing machine or hand-stitching for a personal touch.
These techniques ensure your quilt is not only beautiful but also durable and functional.
Decorative Finishing Ideas
Add decorative touches to elevate your quilt’s aesthetic:
- Binding: Choose a contrasting fabric for the quilt’s edges to frame the design beautifully.
- Embroidery: Hand-embroider names, dates, or symbols onto the quilt for personalization.
- Patches: Sew on patches from old clothing to introduce new stories into the quilt.
By employing these finishing ideas, you enhance the quilt’s charm while celebrating the history of the fabrics used. Quilts provide warmth and comfort, making them perfect for cozy evenings or as meaningful gifts [43]. Creating quilts also allows for a therapeutic crafting experience, which can improve mental health through creativity [44].
24. Create a Message Board from Old Frames

Transforming old frames into stylish message boards combines creativity with functionality. This project not only helps reduce waste but also adds a personal touch to your decor.
Selecting Frames for Message Boards
Start with vintage or thrifted frames. Look for:
- Size: Choose large frames for a more substantial board.
- Style: Opt for ornate frames for a classic look or simple ones for a modern vibe.
- Condition: Ensure the frame is sturdy and free of damage.
Vintage frames provide charm while serving a practical purpose. They can elevate any space, from kitchens to kids’ rooms.
Techniques for Board Preparation
Prepare the frame for use as a message board by following these steps:
- Clean the Frame: Remove dust and dirt with a soft cloth.
- Remove the Backing: Take out the glass and backing from the frame.
- Add a Board: Cut a piece of corkboard or foam board to fit inside the frame. Secure it in place.
- Paint or Cover: Optionally, paint the frame or cover the board with fabric for added style.
These steps ensure your message board is both functional and visually appealing.
Ideas for Decorative Finishes
Enhance your message board with unique finishes:
- Chalkboard Paint: Use chalkboard paint for a customizable surface.
- Fabric Covers: Wrap the board in colorful fabric for a soft touch.
- Magnetic Paint: Apply magnetic paint to allow magnets for notes and photos.
These finishes not only improve aesthetics but also increase functionality, making your board a versatile addition to your home.
Unique Design Ideas
Consider these creative designs for your message board:
- Gallery Style: Arrange multiple frames of different sizes for a gallery wall effect.
- Color Coordination: Match the frame color with your room’s palette for cohesion.
- Theme-Based: Create themed boards, such as a travel board with postcards or a seasonal board displaying holiday cards.
These ideas make your message board more than just a practical item; they turn it into a decorative focal point that reflects your personality while enhancing organization [46].
25. Upcycle Old Curtains into Table Linens
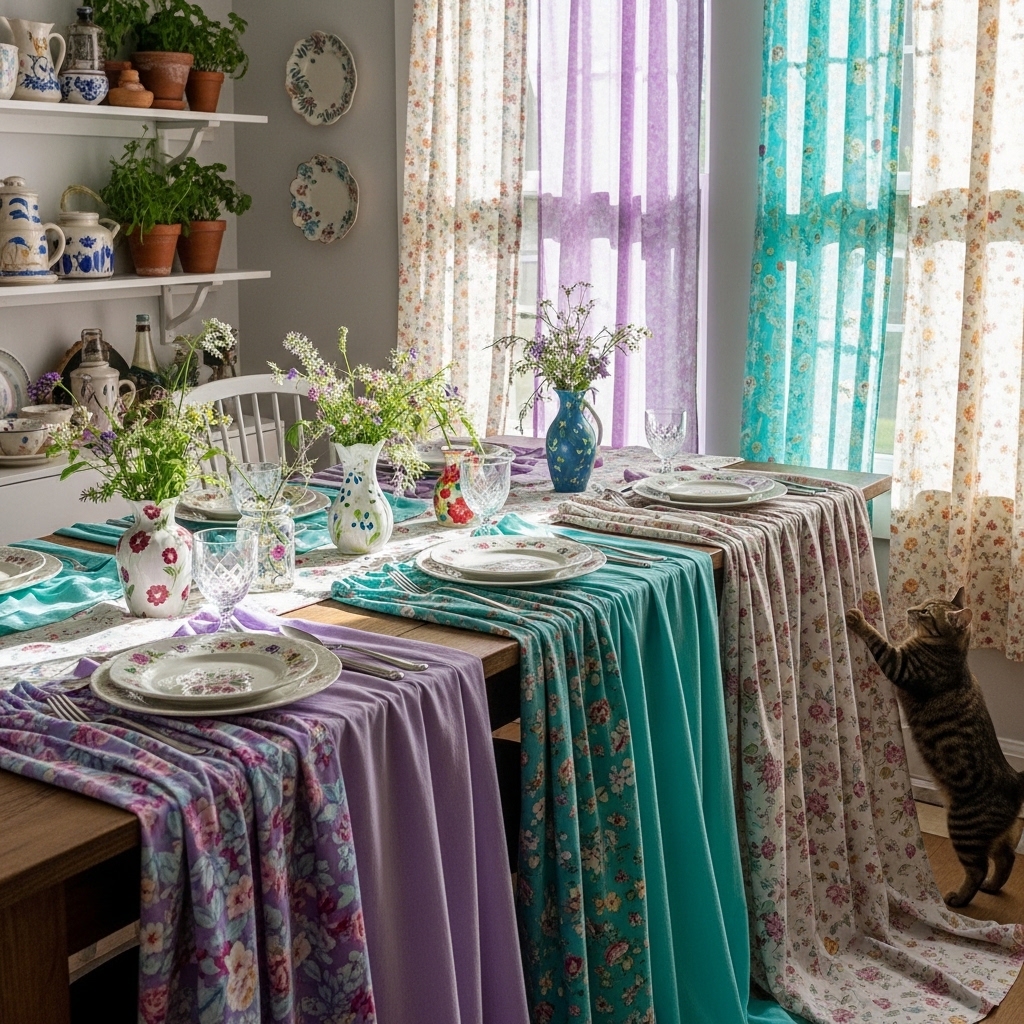
Transform your old curtains into beautiful table linens. This project not only elevates your dining experience but also promotes sustainability by repurposing fabric that may otherwise go to waste.
Choosing the Right Curtains
Select curtains that complement your home decor. Look for patterns and colors that harmonize with your dining area. Consider the fabric type as well. Heavier fabrics like canvas or velvet add elegance, while lighter materials like cotton create a casual feel. Curtains can be easily transformed into:
- Tablecloths
- Placemats
- Napkins
Sewing Techniques for Table Linens
Basic sewing skills are all you need for this project. Start by cutting the curtains to your desired size. Use a sewing machine or hand stitch the edges to prevent fraying. Here are some techniques to enhance your pieces:
- Hemming: Fold fabric edges and sew for a clean finish.
- Bias Tape: Add bias tape for decorative edges and durability.
- Patchwork: Combine different fabrics for a unique design.
These techniques ensure your table linens not only look good but also withstand regular use.
Decorative Ideas for Finishing Touches
Add flair to your table linens with decorative elements. Here are some ideas:
- Stenciling: Use fabric paint to stencil designs on your linens.
- Embroidery: Personalize with monograms or patterns.
- Fringe or Lace: Sew on fringe or lace for a touch of elegance.
These finishing touches enhance the aesthetic appeal of your upcycled table linens, making your dining experience more inviting.
By repurposing old curtains, you not only reduce waste but also create unique table linens that reflect your style [47]. This project embodies creativity and eco-friendliness, aligning with the principles of sustainable living [3].
26. Create Decorative Wall Planters from Bottles
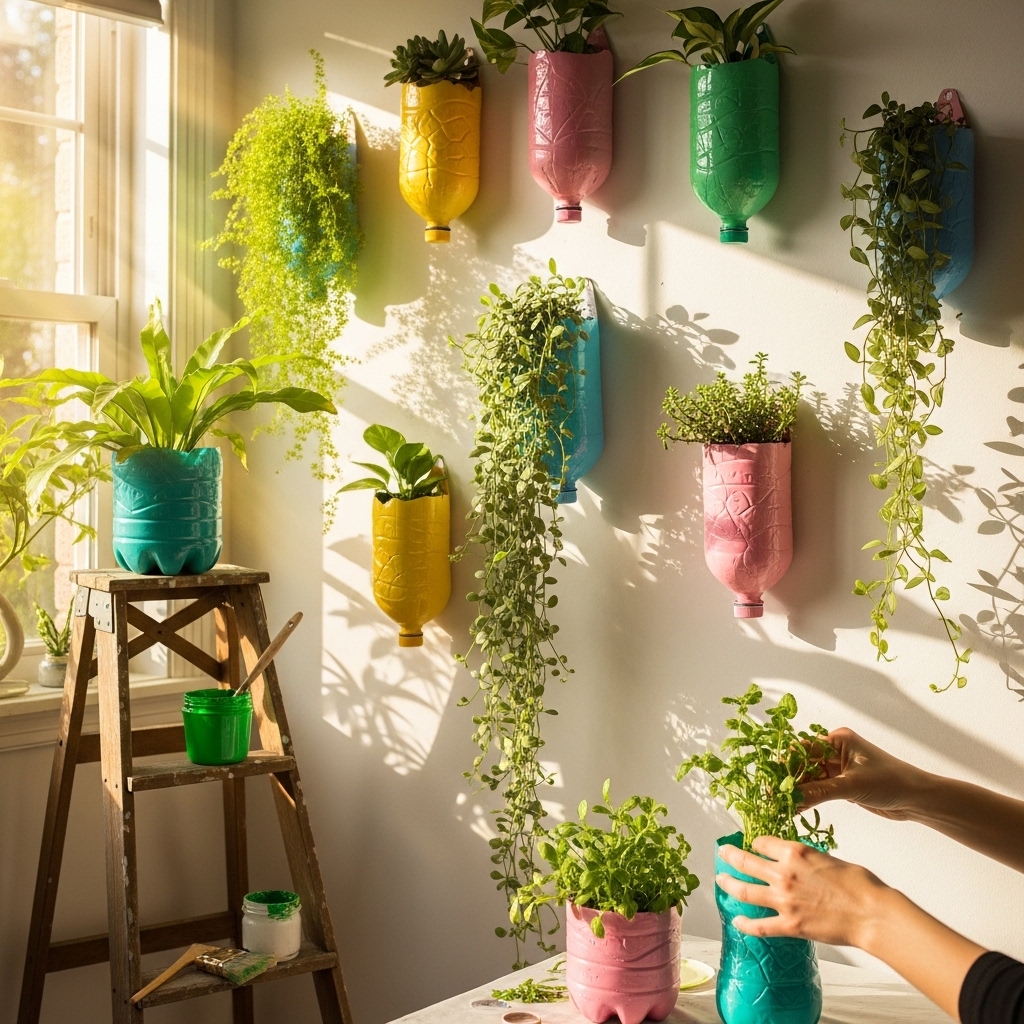
Transforming bottles into decorative wall planters is an innovative way to enhance your home decor while promoting sustainability. This project not only repurposes plastic waste but also adds greenery to your walls, creating a refreshing atmosphere.
Selecting Suitable Bottles
Choose bottles that are suitable for upcycling. Look for the following:
- Plastic bottles: Lightweight and easy to cut.
- Glass bottles: Offer a stylish look but require careful handling.
- Wine or soda bottles: Unique shapes add character.
Ensure they are clean and dry before starting your project.
Techniques for Wall Mounting
Mounting your bottles is essential for stability and aesthetics. Follow these techniques:
- Use brackets: Securely attach brackets to the wall and slide the bottles in.
- Rope or twine: Create a hanging effect by wrapping twine around the neck of the bottle and securing it to a hook or nail.
- Screw hooks: Drill screw hooks into the wall and hang the bottles directly.
Choose a method that complements your decor style.
Planting Ideas for Your Wall Planters
Select plants that thrive in vertical spaces. Consider these options:
- Succulents: Low maintenance and thrive in small spaces.
- Herbs: Freshen your kitchen with basil or mint.
- Trailing plants: Such as pothos or ivy, create a cascading effect.
Ensure the plants are suitable for the amount of sunlight available in your space. Pairing the right plants with your bottles enhances both beauty and air quality, making your home more inviting [50].
By upcycling bottles into wall planters, you reduce waste and beautify your living area. This budget-friendly project reflects your commitment to eco-friendly living while showcasing your creativity.
27. Upcycle Old Bags into Stylish Totes
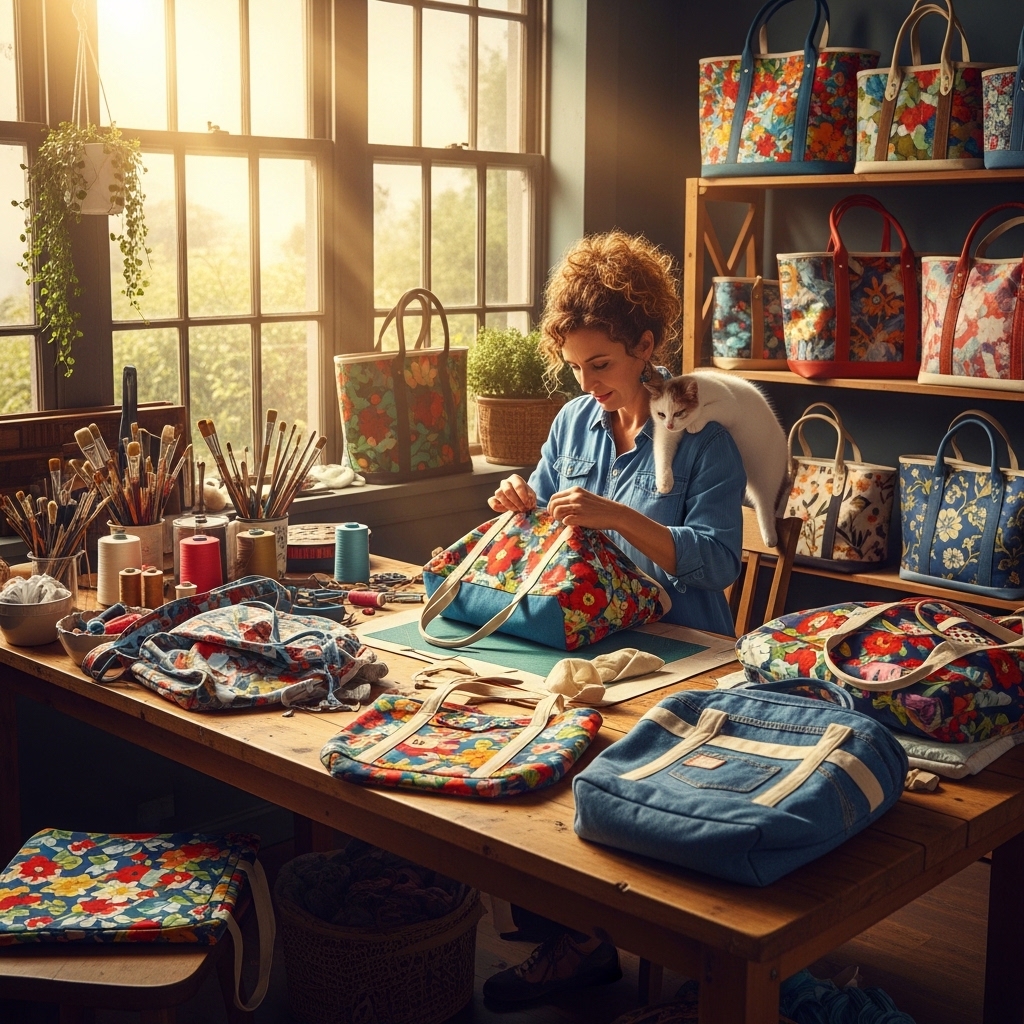
Transform old bags into trendy totes that reflect your personal style. This project not only repurposes unused items but also offers a sustainable alternative to fast fashion.
Choosing the Right Bags
Select bags that have potential for upcycling. Look for:
- Old backpacks: These often have durable materials.
- Shopping bags: Lightweight and easy to manipulate.
- Tote bags: Perfect for adding new features.
Assess the condition of the bags. Ensure they are clean and free from significant damage. This will make the transformation easier and more visually appealing.
Sewing Techniques for Tote Creation
Master a few simple sewing techniques to create your tote. Here are essential skills to consider:
- Reinforcement: Use double stitching on seams for durability.
- Adding pockets: Integrate pockets from old bags for functionality.
- Strap adjustments: Shorten or lengthen straps based on your preference.
For example, you can reinforce bag straps by sewing additional fabric or webbing underneath for added strength.
Decorative Ideas for Personalized Totes
Make your tote unique with decorative elements. Try these ideas:
- Fabric paint or markers: Personalize with your designs.
- Embellishments: Add buttons, patches, or fabric scraps.
- Upcycled closures: Use zippers or snaps from old bags for a polished finish.
Consider making themed totes for different occasions. A beach tote could feature bright colors and fun patterns, while an everyday tote might use neutral tones for versatility.
By following these steps, you can create stylish, functional totes while contributing to a more sustainable lifestyle. Upcycling reduces waste and promotes eco-friendly practices in home decor [6].
28. Create Unique Bookmarks from Recycled Paper
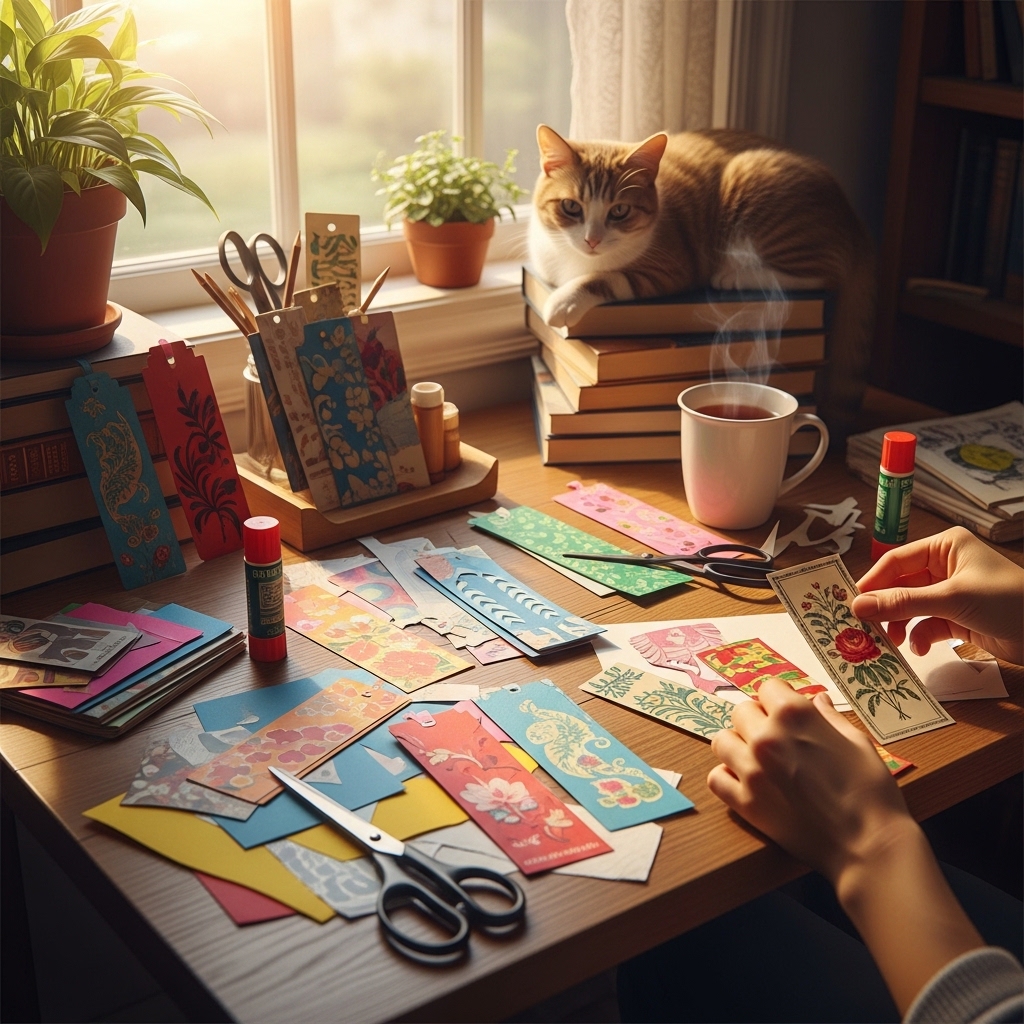
Crafting bookmarks from recycled paper is an enjoyable and sustainable project. Not only do they reduce waste, but they also allow for creative expression. You can easily transform scrap paper into functional art.
Selecting Recycled Paper Types
Choose the right paper for your bookmarks. Consider these options:
- Old greeting cards: They provide sturdy and colorful material.
- Magazines: Use vibrant images for eye-catching designs.
- Wrapping paper: Reuse decorative paper that would otherwise go in the trash.
- Scrapbook paper: Perfect for intricate designs and patterns.
Techniques for Crafting Bookmarks
Follow these simple steps to create your bookmarks:
- Cut the Paper: Use scissors or a paper cutter to obtain your desired bookmark size. Standard sizes are 2 inches by 6 inches.
- Decorate: Use markers, stamps, or stickers to personalize your bookmarks.
- Laminate (Optional): For durability, consider laminating your bookmarks. This protects them from wear and tear.
- Add a Tassel: Use yarn or ribbon to create a tassel for a decorative touch.
Ideas for Decorative Embellishments
Enhance your bookmarks with unique embellishments. Here are some ideas:
- Painted Edges: Use acrylic paint to add color to the edges of your bookmarks.
- Washi Tape: Apply washi tape for patterns and to reinforce edges.
- Quotes or Affirmations: Write inspiring quotes to motivate readers.
By using recycled materials, you not only create beautiful bookmarks but also contribute to sustainability [54]. This project exemplifies how upcycling improves sustainability in home decor [7]. Plus, crafting bookmarks reduces waste and promotes eco-friendliness [55].
29. Upcycle Old Electronics into Art

Transform outdated electronics into unique art pieces that challenge traditional perceptions of waste. This creative endeavor not only repurposes old items but also adds a modern touch to your home decor.
Choosing Suitable Electronics for Art
Select electronics that are no longer functional or needed. Good candidates include:
- Old circuit boards
- Broken keyboards
- Outdated smartphones
- Unused cables
These items often have interesting shapes and colors, making them ideal for artistic projects. Ensure that the electronics are safe to work with. Remove any hazardous components before starting your project.
Techniques for Assembly
Assemble your chosen electronics using a variety of techniques. Consider the following methods:
- Collage: Create a mixed media piece by combining various electronic parts. Use glue or wire to hold pieces together.
- Sculpting: Build a 3D sculpture using larger items like old monitors or speakers. Wire them securely to maintain stability.
- Framing: Use circuit boards or screens as a base for your artwork. Frame the piece for a polished look.
Always wear safety gear when handling electronics. Use gloves to protect your hands, especially when working with sharp edges.
Ideas for Display
Showcase your electronic art in creative ways. Here are some ideas:
- Wall Art: Mount smaller pieces on a canvas or directly onto the wall for a striking focal point.
- Table Centerpieces: Use larger items like keyboards or circuit boards as unique table displays.
- Illuminated Art: Incorporate LED lights into your designs for a stunning visual effect.
These display ideas not only enhance your decor but also spark conversations about sustainability and creativity. Upcycling electronics reduces waste and promotes eco-friendliness in home decor [56]. Additionally, art created from electronics is a growing trend that showcases innovation [57]. Transforming these items into art reflects a commitment to eco-friendly living while adding a personal touch to your space [58].
30. Create Decorative Gift Wrap from Old Maps
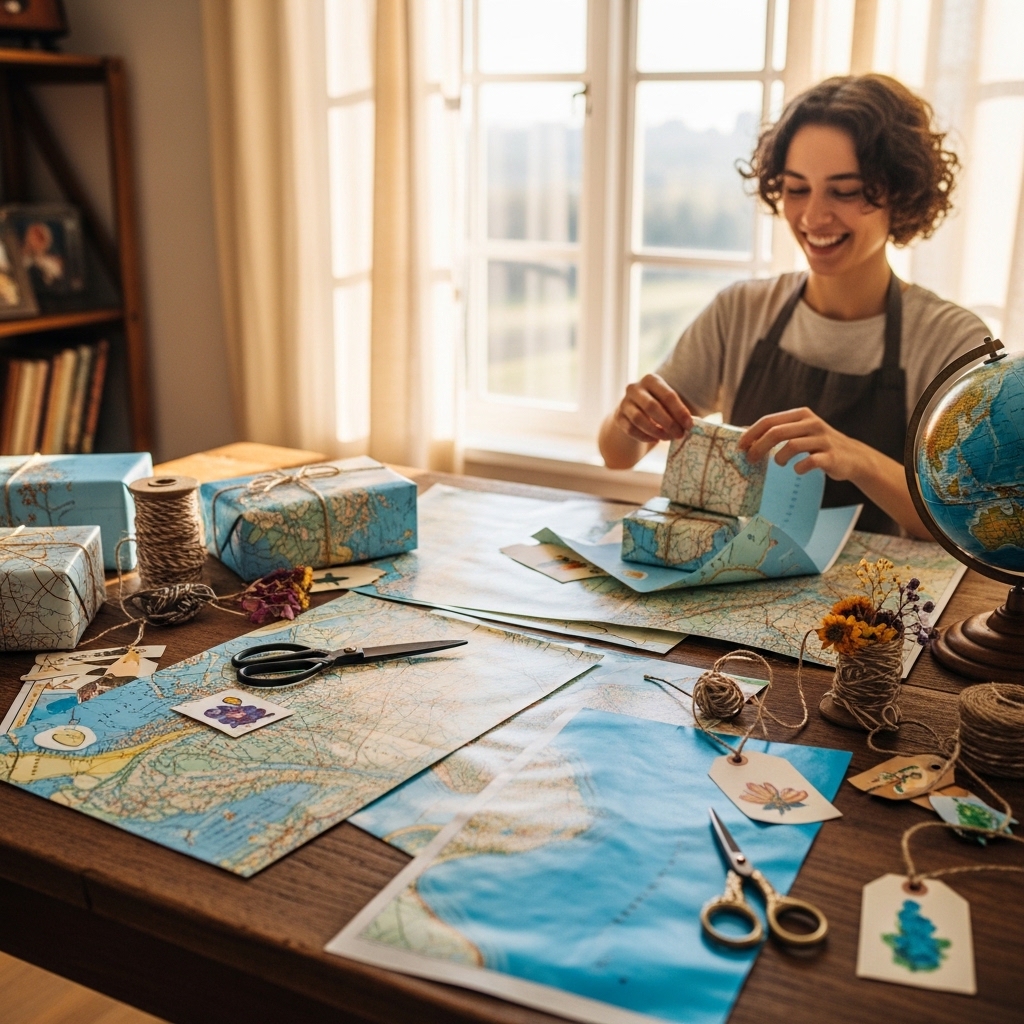
Transforming old maps into gift wrap adds a personal touch to your presents. This eco-friendly approach reduces waste and showcases creativity.
Selecting Suitable Maps
Choose maps that are visually appealing. Look for vibrant colors and interesting patterns. Vintage maps often have a unique charm that enhances your gift’s presentation. Consider the occasion. A map of the recipient’s favorite place can make the gift even more special.
Techniques for Wrapping Gifts
- Flat Wrapping: Lay the map flat on a surface. Place the gift in the center and fold the edges over. Secure with tape or twine.
- Bag Style: Cut the map into a rectangular shape. Fold the sides to create a bag. Seal the bottom and fill with your gift.
- Layering: Combine maps with solid-colored paper. Use a map as an outer layer to add texture and interest.
Ideas for Embellishing Gift Wrap
Enhance your map wrap with additional elements. Here are some creative ideas:
- Natural Twine: Use twine or string for a rustic look.
- Dried Flowers: Attach a small bouquet of dried flowers for a charming touch.
- Personalized Tags: Create tags from leftover map pieces. Write a heartfelt message to make it personal.
Using old maps for gift wrap not only reduces waste but also turns every gift into a unique work of art. This approach embodies the spirit of upcycling and sustainability [59].
31. Upcycle Broken Toys into Decorative Pieces
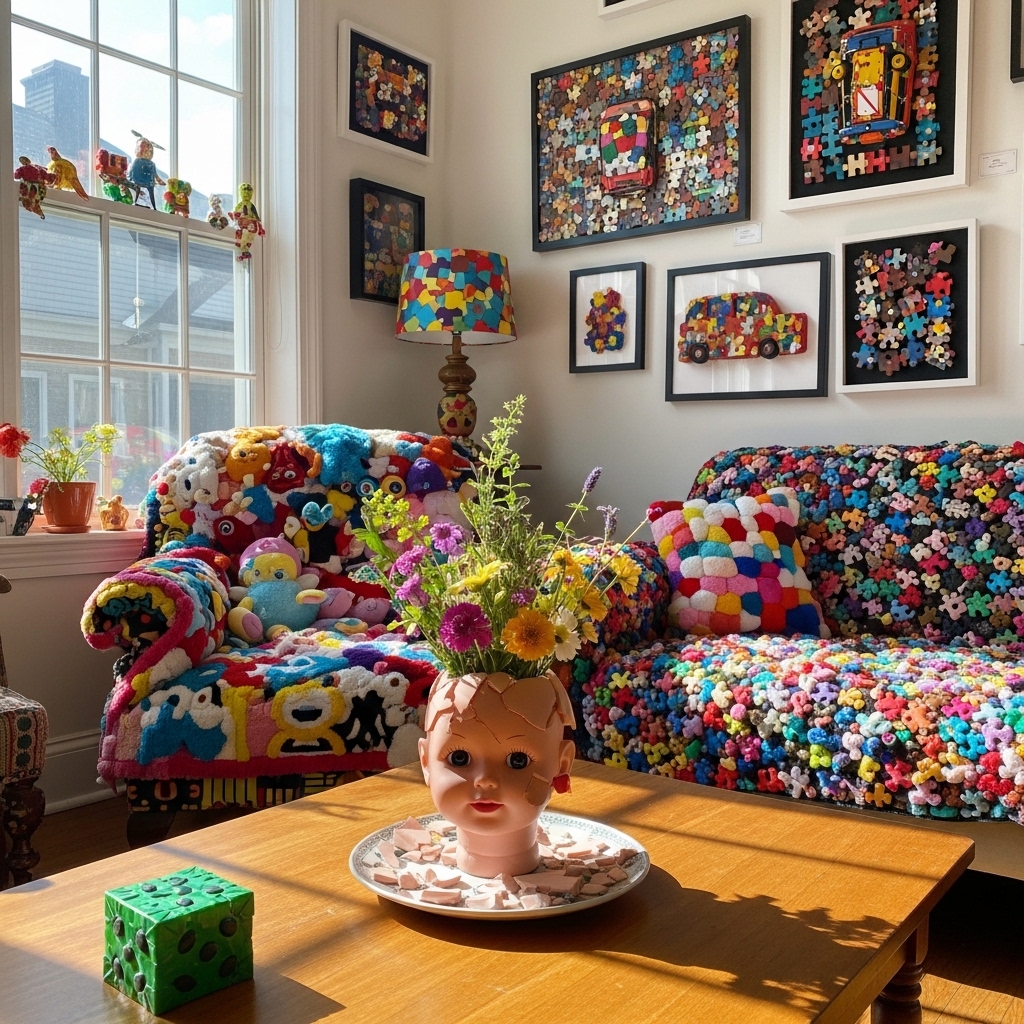
Transforming broken toys into playful decor items adds charm and nostalgia to your home. This creative process not only reduces waste but also showcases your artistic flair.
Choosing Toys Suitable for Upcycling
Start by selecting broken toys that still hold visual appeal. Look for:
- Toys with unique shapes or bright colors
- Plastic or wooden pieces that can be easily cleaned
- Items that resonate with your personal style or childhood memories
These toys can be transformed into eye-catching decorative pieces.
Techniques for Transforming Toys
Explore various methods to repurpose your selected toys:
- Shadow Boxes: Arrange broken toy parts inside shadow boxes. Create themed displays, such as a childhood memory box or a whimsical nature scene.
- Wall Art: Adhere toys directly onto canvas or wooden boards. Paint the background for a cohesive look. This technique turns everyday items into vibrant art pieces.
- Table Centerpieces: Stack and glue toys together to form unique sculptures. Use them as table centerpieces or decorative accents on shelves.
Each approach breathes new life into discarded toys while showcasing your creativity.
Ideas for Displaying Your Creations
Once you’ve transformed the toys, consider how to showcase them effectively:
- Floating Shelves: Install floating shelves to display your creations. Arrange them by color or theme for a visually appealing effect.
- Gallery Wall: Create a gallery wall using framed shadow boxes. Group various sizes and shapes for an eclectic look.
- Table Displays: Use decorative trays to arrange smaller toy pieces. This keeps your decor organized and visually engaging.
These display ideas ensure your upcycled toys remain a conversation starter in your home. Embrace the nostalgia while enhancing your decor with these playful elements.
32. Create a Wall Clock from Old Records
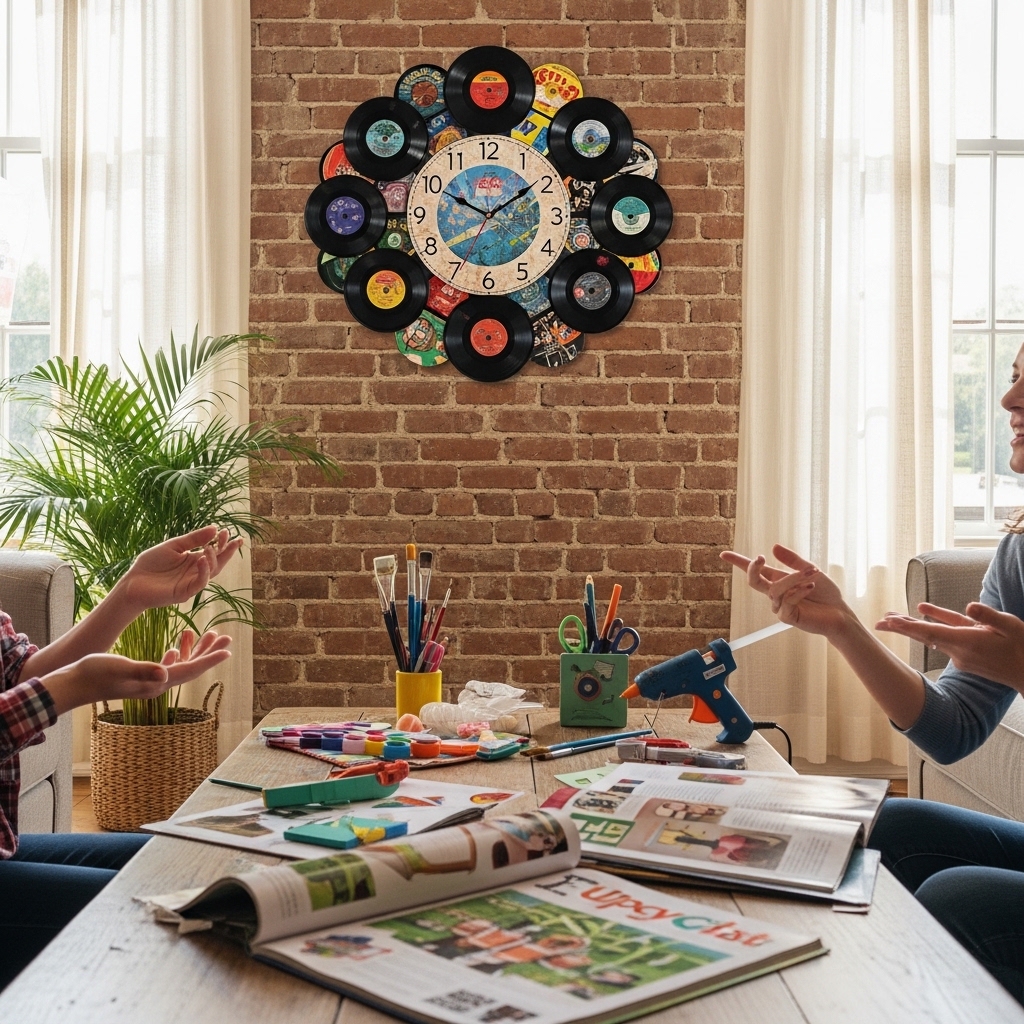
Transforming old vinyl records into wall clocks is a creative way to blend nostalgia with functionality. This DIY project adds a unique touch to your decor while promoting sustainability.
Selecting the Right Records
Choose records that resonate with your personal style. Look for albums that you love, even if they are scratched or unplayable. Here are some tips for selection:
- Genre Preference: Select records from your favorite music genres.
- Visual Appeal: Consider album covers that can complement your room’s color scheme.
- Sentimental Value: Opt for records that carry personal memories or stories.
Techniques for Creating Clock Faces
Creating an eye-catching clock face is essential. Follow these steps for a successful assembly:
- Drill a Hole: Use a drill to create a hole in the center of the record. This will fit the clock mechanism.
- Attach Clock Mechanism: Insert the clock movement through the hole. Secure it on the back.
- Decorate the Face: Use paint, stickers, or numbers to mark the hours. Let creativity guide you.
Ideas for Unique Clock Hands
The clock hands can enhance your design. Consider these ideas:
- Repurpose Materials: Use old cutlery or wood for a rustic look.
- Color Contrast: Paint hands in colors that pop against your record’s surface.
- Thematic Designs: Match your clock hands to the music genre of the record. For instance, use sleek metal hands for a jazz record.
By following these steps, you can create a stylish wall clock that reflects your musical taste and commitment to sustainability. Each clock becomes not just a timepiece but a conversation starter, celebrating both upcycling and your unique style.
33. Upcycle Cardboard Boxes into Storage Solutions
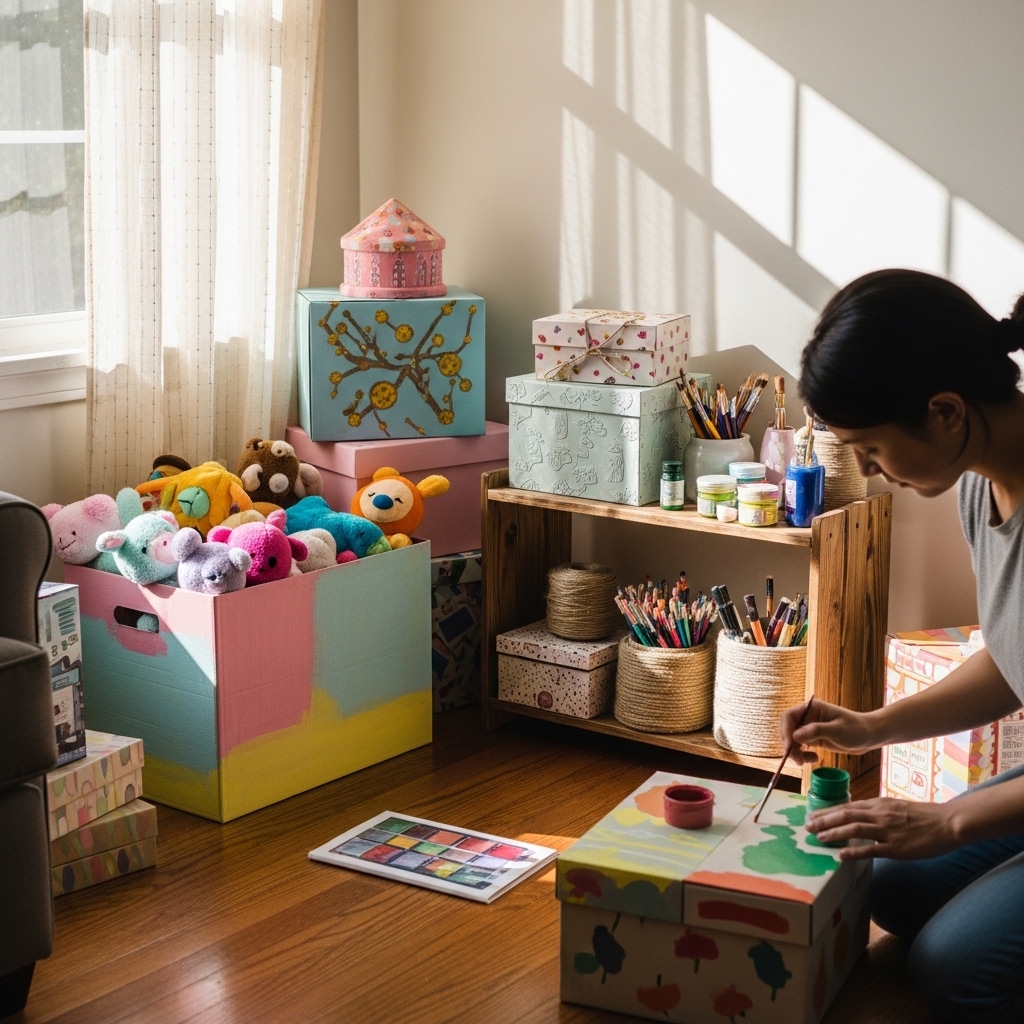
Cardboard boxes are often overlooked as mere waste. However, they can be transformed into stylish and functional storage solutions for your home. This process not only helps organize your space but also supports eco-friendly living.
Choosing the Right Cardboard Boxes
Not all cardboard boxes are created equal. Here’s how to select the best ones for your upcycling project:
- Size Matters: Opt for boxes that fit your storage needs. Larger boxes work great for bulky items, while smaller ones are ideal for office supplies.
- Quality Check: Choose boxes that are sturdy and free of damage. Look for ones made from thicker cardboard for added durability.
- Design Potential: Consider the box’s surface. Plain boxes can be easily decorated, while patterned ones might require less work.
Techniques for Decoration
Make your cardboard boxes visually appealing with these techniques:
- Paint: Use acrylic paint for a vibrant finish. You can also use spray paint for a smooth coat.
- Fabric Covering: Wrap boxes in fabric for a textured look. Use hot glue to secure the fabric in place.
- Labeling: Personalize your boxes with labels. Use decorative stickers or write directly on them for easy identification.
Ideas for Functional Storage
Transform your upcycled boxes into clever storage solutions:
- Craft Supply Organizer: Use smaller boxes to store paintbrushes, scissors, and other craft materials. Arrange them in a larger box for a tidy display.
- Kids’ Toy Storage: Create a fun toy chest by decorating a large box with bright colors. This encourages kids to keep their toys organized.
- Office Supply Caddy: Stack several boxes to create a multi-tiered organizer for pens, papers, and notebooks on your desk.
By upcycling cardboard boxes, you reduce waste while enhancing your home decor. This creative approach supports sustainability and allows you to personalize your space.
34. Create Unique Wall Art from Fabric Scraps
Transforming fabric scraps into wall art offers a creative way to personalize your space while supporting sustainability. These projects allow you to showcase color, texture, and memories through unique designs.
Selecting Suitable Fabric Scraps
Choose a variety of fabric scraps for your project. Look for:
- Textures: Mix smooth and rough fabrics for depth.
- Colors: Select complementary colors to create harmony.
- Patterns: Use prints to add visual interest.
Gather remnants from old clothes, tablecloths, or even discarded upholstery. Each piece tells a story, enhancing the emotional value of your art [1].
Techniques for Arranging Fabrics
Arranging your fabric scraps creatively is key to stunning wall art. Consider these techniques:
- Layering: Overlap pieces to create a sense of dimension.
- Framing: Use a wooden frame for structure. Attach fabric directly to the frame for a clean look.
- Tacking: Secure pieces using fabric glue or a hot glue gun. This method allows for easy adjustment before finalizing the design [2].
Experiment with different layouts on a flat surface before committing to the wall. This step ensures you love the overall look.
Ideas for Displaying Wall Art
Once your fabric wall art is complete, it’s time to display it. Here are some ideas:
- Gallery Wall: Combine multiple pieces for a striking visual impact.
- Above Furniture: Hang your art over a sofa or console table to create a focal point.
- Outdoor Spaces: Enhance your garden with fabric art by placing it against a neutral wall or in a sheltered area [2].
Embellishing your fabric art with fairy lights can also add warmth and charm to your home, especially during evenings [2]. Each display method enhances the aesthetic value of your home while showcasing your creativity.
35. Upcycle Old Candles into Decorative Holders
Transforming old candles into stylish holders adds a unique touch to your home decor. This project combines creativity with sustainability, allowing you to repurpose items that would otherwise go to waste.
Choosing the Right Candles
Select candles that have burnt down or are no longer usable. Look for:
- Color: Choose colors that match your decor.
- Size: Consider the height and diameter for balance.
- Shape: Vary shapes to create visual interest.
Techniques for Preparing Holders
- Clean the Candles: Remove any leftover wax. Use warm water and soap to wash.
- Select Holder Materials: You can use:
- Secure the Candle: Place the prepared candle into your chosen holder. For added flair, use twine or decorative paper around the holder.
Decorating Your Finished Holders
Enhance the aesthetic with these ideas:
- Paint: Apply a coat of chalk paint for a rustic finish [6].
- Embellishments: Add ribbons, lace, or dried flowers for a personal touch.
- Layering: Combine different heights and styles on a tray for a curated look.
By following these steps, you create beautiful candle holders that serve as functional decor while embracing eco-friendly practices. Each holder becomes a conversation piece, showcasing your creativity and commitment to sustainability.
36. Create a Decorative Tray from Old Frames
Transforming old frames into decorative trays adds charm and functionality to your home. This project not only showcases your creativity but also champions sustainability.
Choosing the Right Frames for Trays
Select frames that are sturdy and in good condition. Look for:
- Old picture frames: These often have intricate designs, adding character.
- Mirror frames: Their larger size can create eye-catching trays.
- Vintage frames: These provide a unique aesthetic that complements various decor styles.
When sourcing, check local thrift stores or garage sales for affordable options. You can find frames that are not just functional but also a statement piece for your decor.
Techniques for Assembly
Creating a decorative tray requires some basic assembly skills. Here’s how to do it:
- Remove the glass and backing from the frame carefully.
- Reinforce the back using a piece of plywood or cardboard. This adds stability.
- Attach handles on both sides. Use sturdy metal handles for a polished look. Ensure they are securely fastened to support the tray’s weight.
- Use screws or strong adhesive for attaching handles, checking that they are flush and even.
Ideas for Decorative Finishes
Enhance your tray’s appeal with these finishing touches:
- Paint: Use chalk paint for a rustic finish that complements farmhouse decor [6].
- Stain: A wood stain can highlight the frame’s natural beauty.
- Decoupage: Add patterned paper or fabric to the base for a personalized touch.
Consider layering items on your tray, like candles, books, or plants, to create a curated look. Each design showcases your style while promoting eco-friendly practices.
37. Upcycle Old Phone Books into Unique Art
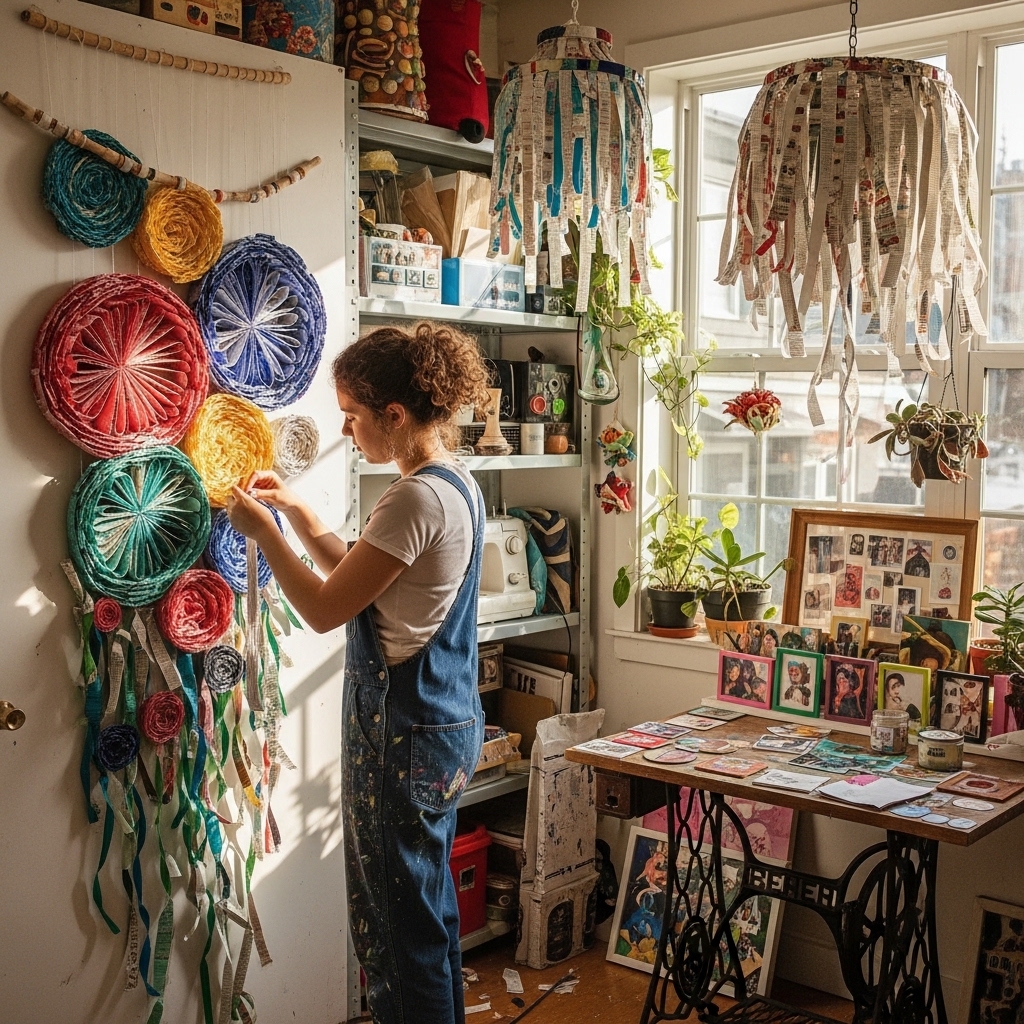
Transforming old phone books into artistic decor is a fun and eco-friendly project. This creative endeavor allows you to repurpose outdated materials while adding a personal touch to your home.
Choosing Suitable Phone Books
Select phone books that you no longer use. Look for those with thick, colorful pages for a vibrant effect. Vintage phone books can add a nostalgic flair to your artwork. Ensure the pages are intact and free from excessive wear.
Techniques for Art Assembly
- Collage Art: Cut pages into various shapes and sizes. Arrange them on a canvas or a sturdy board. Use glue to secure them in place.
- 3D Sculptures: Fold pages into intricate shapes. Create flowers, animals, or abstract forms. This technique adds dimension to your decor.
- Framed Pieces: Select a few striking pages. Frame them individually or as a collection. This creates a polished look while showcasing your artistic flair.
Ideas for Displaying Your Art
- Gallery Wall: Create a gallery wall with your phone book art. Mix and match different styles and frames for visual interest.
- Shelf Decor: Place your creations on bookshelves alongside other decorative items. This adds character and charm to your space.
- Table Centerpieces: Use small sculptures as unique centerpieces for your dining or coffee tables. This sparks conversation and elevates your decor.
Upcycling old phone books celebrates their beauty and history. It transforms them into unique pieces that reflect your creativity. Explore various techniques to find your style and express your artistic vision.
38. Create a Decorative Bowl from Old Magazines

Transforming old magazines into decorative bowls adds a splash of color and creativity to your home decor. This eco-friendly project not only recycles materials but also showcases your artistic flair.
Selecting Suitable Magazines
Choose magazines with vibrant colors and interesting patterns. Look for:
- Fashion magazines
- Travel brochures
- Art publications
Ensure the pages are thick enough to hold their shape. The more diverse the designs, the more unique your bowl will be.
Techniques for Bowl Assembly
- Tear Pages: Start by tearing magazine pages into strips. Vary the sizes for a more textured look.
- Create a Base: Use a balloon or a bowl as a mold. If using a balloon, inflate it to your desired size.
- Layer Up: Apply glue to the strips and layer them around the mold. Overlap the strips to ensure strength and stability.
- Drying Time: Allow the bowl to dry completely. This may take several hours or overnight.
To strengthen your bowl, consider using a mixture of glue and water as a decoupage medium. This technique not only binds the strips but also adds a glossy finish once dry.
Ideas for Decorative Finishes
Once dried, personalize your bowl with additional touches:
- Paint: Add a coat of spray paint for a uniform color.
- Sealing: Use a clear acrylic sealer to protect the surface and enhance durability.
- Embellishments: Attach beads, ribbons, or other decorative items to enhance its visual appeal.
Consider using your new bowls for holding keys, as centerpieces, or for organizing small items around the house. This project combines creativity and functionality, making it a fantastic addition to your upcycled home decor collection.
39. Upcycle Old Chairs into Planters
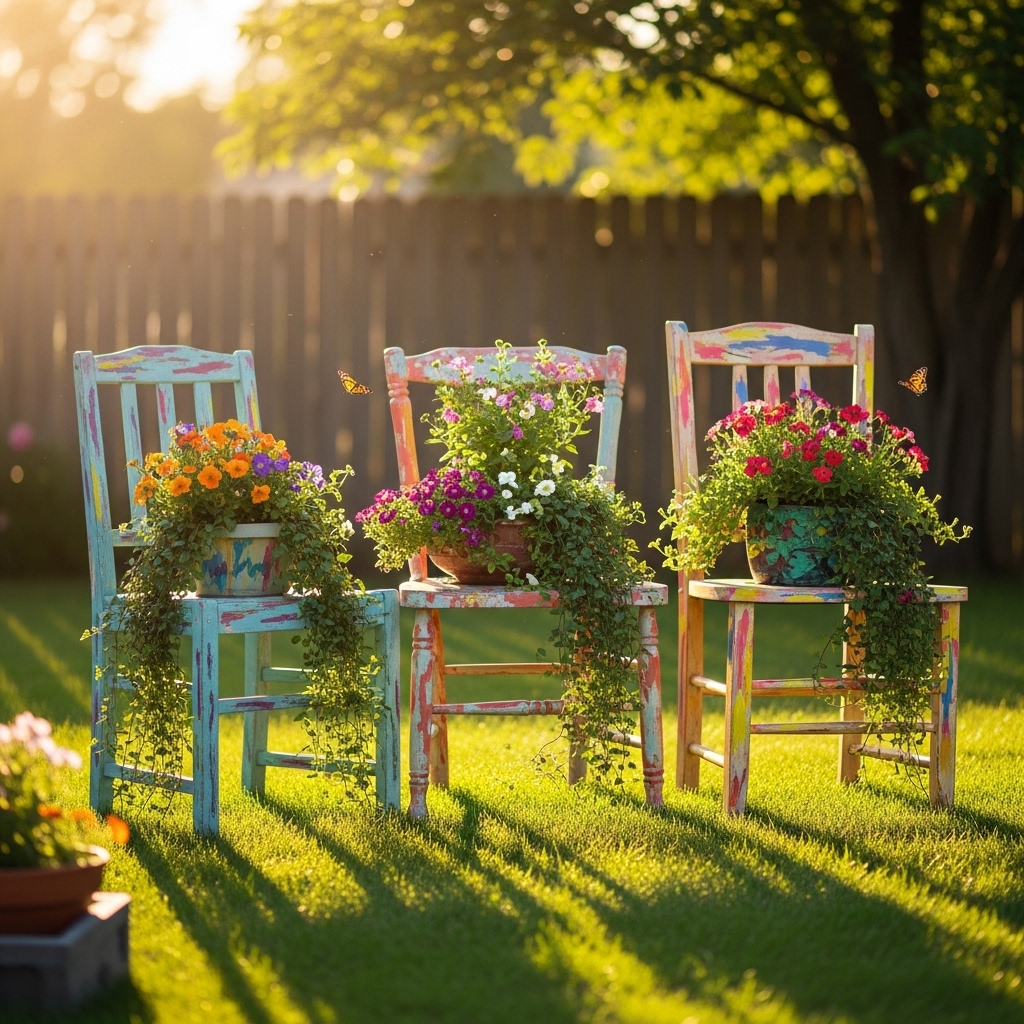
Transforming old chairs into quirky planters adds charm and character to your outdoor space. This project combines creativity with sustainability, turning discarded furniture into vibrant greenery.
Choosing Suitable Chairs
When selecting chairs for your planter project, consider these factors:
- Condition: Look for sturdy chairs with a solid frame. Minor cosmetic flaws are okay.
- Material: Wooden chairs work well for rustic designs. Metal chairs offer a modern touch.
- Size: Choose chairs that can accommodate the desired plants. Larger chairs can hold more soil and drainage.
Techniques for Preparing Chairs for Planting
To prepare your chair for its new role as a planter, follow these steps:
- Clean Thoroughly: Remove dirt and grime. Use a mild soap solution to ensure a clean surface.
- Seal Holes: If the chair has holes, seal them with wood filler or silicone caulk to retain soil.
- Create Drainage: Drill holes in the seat or bottom for excess water to escape. This prevents root rot.
Decorating Your Chair Planters
Make your chair planters visually striking with these ideas:
- Paint: Use vibrant colors to match your garden aesthetic. Chalk paint offers a matte finish for a rustic look.
- Add Accessories: Incorporate decorative elements like fairy lights, garden figurines, or colorful rocks around the base.
- Plant Selection: Opt for flowers or herbs that thrive in your climate. Consider using trailing plants to create a cascading effect.
Example Project: An old wooden rocking chair can become a stunning planter. Fill the seat with soil and add petunias or ivy. The rocking motion adds a whimsical touch to your garden.
By upcycling old chairs into planters, you not only beautify your space but also contribute to environmental sustainability. Each project reflects your personal style while promoting eco-friendly living.
40. Create Upcycled Jewelry Holders from Old Drawers
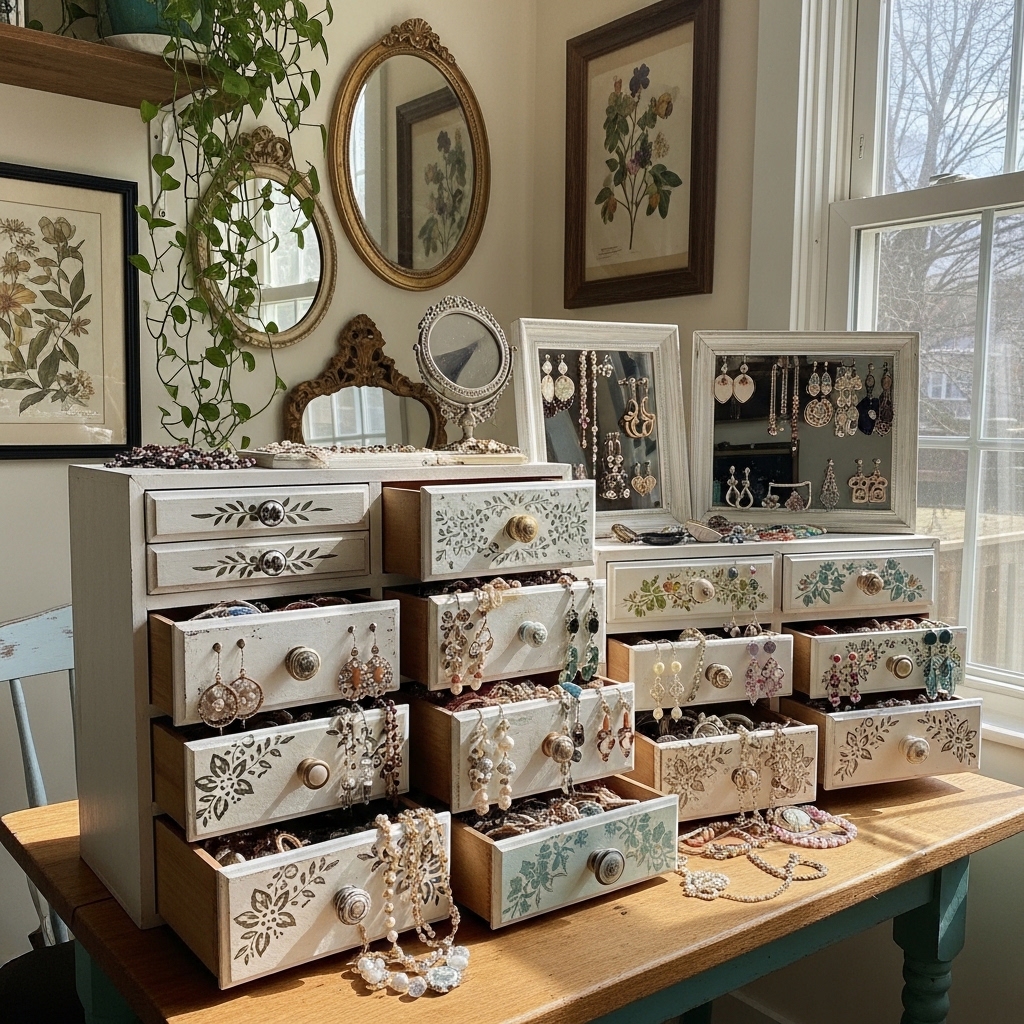
Transforming old drawers into unique jewelry holders adds charm to your decor while promoting sustainability. This project not only repurposes unused items but also provides a stylish way to organize your jewelry.
Choosing suitable drawers
Select drawers that match your aesthetic and size needs. Look for:
- Vintage wooden drawers for a rustic look.
- Shallow drawers for easy access to items.
- Decorative drawers with interesting hardware for added flair.
Techniques for preparing drawers
Prepare your drawers with these steps:
- Clean and Sand: Remove dust and grime. Sand rough edges for a smooth finish.
- Paint or Stain: Choose a color that complements your decor. Consider using chalk paint for a matte finish.
- Add Lining: Line the bottom with fabric or decorative paper. This prevents scratches and adds a pop of color. Use adhesive craft paper for a quick solution, or consider felt for a softer touch.
Decorating your jewelry holder
Personalize your jewelry holder to reflect your style. Here are some ideas:
- Add Hooks: Install small hooks on the sides for necklaces and bracelets.
- Use Compartments: Divide the drawer with small boxes or dividers for organization.
- Embellish: Decorate the exterior with stencils, washi tape, or decoupage for a unique look.
Example project: An old drawer painted in pastel colors can become a charming jewelry holder. Line it with floral fabric and add hooks on the side. This creates a beautiful and functional piece that enhances your space while keeping your jewelry organized.
41. Upcycle Old Rugs into Wall Hangings
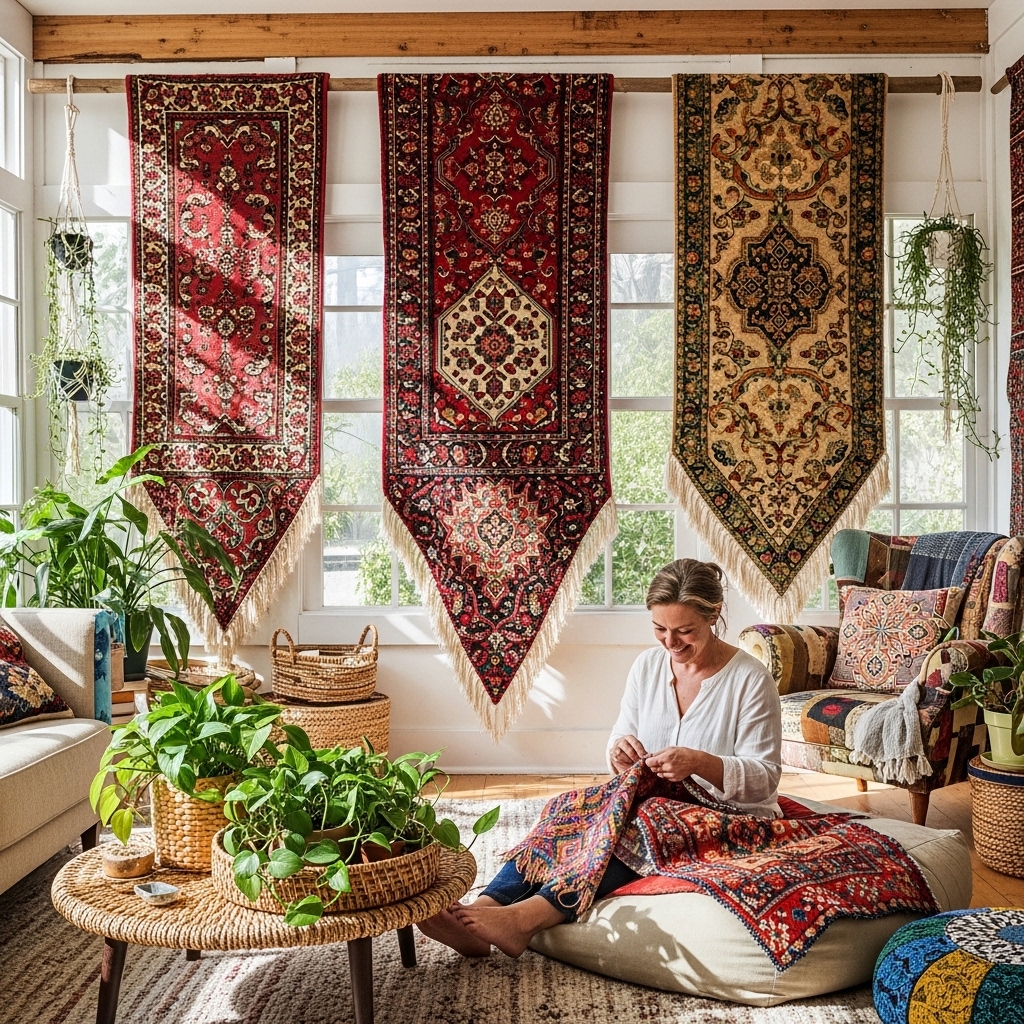
Transforming old rugs into stunning wall hangings adds texture and warmth to your rooms. This DIY project not only repurposes materials but also enhances your home decor with unique flair.
Choosing Suitable Rugs
Select rugs that have vibrant patterns or colors. Vintage Oriental rugs work beautifully due to their rich history and intricate designs. Thrift stores often have a variety of options. Look for rugs that you can cut or modify without losing their charm. This way, even worn-out pieces can shine as wall art.
Techniques for Preparing and Hanging
- Cutting: Trim the rug to your desired size. Ensure you have sharp scissors or a rotary cutter for clean edges.
- Backing: For heavier rugs, consider adding a sturdy backing. Use canvas or felt to give extra support when hanging.
- Hanging:
- Rods: Use a curtain rod or dowel for a chic look. Slide the top edge of the rug over the rod.
- Nails: For lighter pieces, hammer decorative nails into the wall, allowing the rug to drape over them.
- Hooks: Attach hooks or brackets for easy removal and adjustment.
Ideas for Decorative Embellishments
- Layering: Combine multiple rugs for a textured look. Hang smaller pieces within larger ones to create depth.
- Framing: Use wooden frames to border your rugs. This adds a gallery-like feel to your decor.
- Color Coordination: Match your rug colors with the surrounding decor. This creates a harmonious look throughout your space.
Incorporating old rugs as wall hangings not only showcases creativity but also promotes sustainability. Each piece tells a story, turning your wall into a canvas of history and art.
Frequently Asked Questions
These quick answers cover the homeowner questions that come up most often about hackberry trees, including growth, care, and common problems.
How do I start my first upcycling project?
Begin by selecting an item you want to upcycle, such as old furniture or decor. Research different project ideas that align with your skills and interests. Gather the necessary materials and tools, which may include paint, glue, or hardware. Start with simple projects to build your confidence, and gradually tackle more complex ones as you gain experience.
What common mistakes should I avoid in upcycling?
Common mistakes in upcycling include not properly preparing materials, such as failing to clean or sand surfaces, which can lead to poor adhesion or finish. Additionally, underestimating the time required for a project can lead to frustration. Always ensure you have the right tools and materials before starting, and don’t rush the creative process.
What are the environmental benefits of upcycling?
Upcycling significantly reduces waste by repurposing items that would otherwise end up in landfills. It conserves resources by minimizing the demand for new materials, thus lowering carbon emissions associated with production. By choosing upcycled decor, you contribute to a more sustainable lifestyle and promote a circular economy.
Upcycling vs. recycling: what’s the difference?
Upcycling involves creatively repurposing items into new products with higher value, enhancing their functionality or aesthetic appeal. Recycling, on the other hand, breaks down materials to create new raw materials. While both practices are eco-friendly, upcycling retains the original item’s form and adds value, whereas recycling often results in a loss of the original item’s identity.
What materials are ideal for upcycling?
Ideal materials for upcycling include wood (furniture, pallets), textiles (old clothes, curtains), glass (jars, bottles), and metal (cans, silverware). Look for items that are sturdy and have potential for creative transformation. Thrift stores and garage sales are excellent sources for finding unique materials to repurpose.
When is the best time to start upcycling?
There’s no specific season to begin upcycling; you can start any time. However, spring and summer are popular choices due to the availability of outdoor projects and the opportunity to source materials during garage sales or flea markets. Consider starting during a time when you have the space and motivation to dedicate to your projects.
Can I upcycle furniture without prior experience?
Yes, you can upcycle furniture without prior experience! Start with simple projects, such as painting or reupholstering small pieces. Many resources are available online, including tutorials and guides, to help you through the process. Take your time, and don’t hesitate to ask for help or advice from experienced DIYers.
References
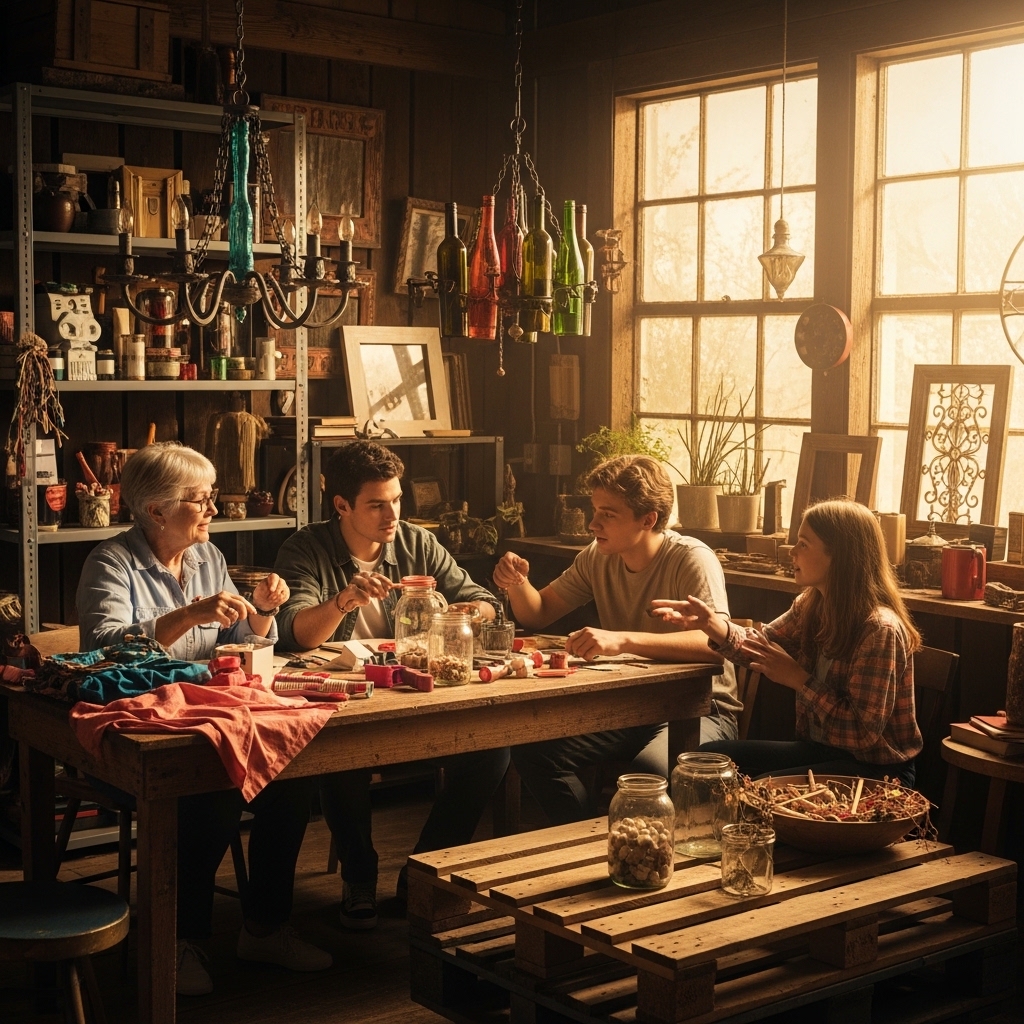
1. Best Practices for Reducing, Reusing, and Recycling …
2. TWO DAY UPCYCLING WORKSHOP: Done up North Style …
3. Reducing Waste: What You Can Do
4. Recycle, Reuse, Repurpose: Making Sculpture with …
5. Upcycling After the Holiday Season
6. Recycling Basics and Benefits
7. Reusing, Recycling, and Upcycling: A Primer
8. Pressed and Blown Glass and Glassware, Not Elsewhere …
9. Sustainable Interiors: Materials, Practices and Design …
10. Be Safe Around Wooden Pallets!
11. Old Vintage Suitcases | Guide to Retro Luggage
12. 8 Expert Luggage and Suitcase Storage Tips
13. Crafts | Marine Debris Program
15. Grow as you go: ‘Peecycling’ helps plants and compost thrive
16. The Safety of Materials Used for Building Raised Beds
17. The Role of Mirrors in Interior Design: Light, Space and …
18. Research on glass imitation jade culture in the ancient … – PMC
19. Recycle, reuse to reduce textile waste from discarded …
20. Home Furnishings and Related Household Items – Purchases
21. Up-recycling of waste wood into value-added room … – PMC
22. Durable rustic wooden signboards. | US Forest Service …
24. Reducing and Reusing Basics
25. Free to Use and Reuse: Art of the Book
26. Old Door Coffee Table – Instructables
27. Furniture Design Department | RISD
28. Decorating Your Dorm Room on a Budget
29. Action of the Week: Practice Upcycling
30. Reuse of CD and DVD Wastes as Reinforcement in Gypsum …
31. Coasters – CHOICE OF 6 DESIGNS
32. Plastic Waste: Challenges and Opportunities to Mitigate … – PMC
33. Modern and Minimalist Wall Hooks
34. Upcycling vintage luggage ideas for unique decor
35. How to Make a Dog Bed Even if You Barely Know …
36. Advancements and Limitations in 3D Printing Materials … – PMC
37. Markets & Uses | Scrap Tires | US EPA
38. Tire-Derived Fuel | Scrap Tires | US EPA
39. Where Rubber Meets the Road: EPA Researchers Study …
40. Upcycled Jewelry with Alternate Materials Instructor: Mïa …
41. Creativity in Jewelry Design Starts with the Basics
42. Making Fashion Sustainable: Waste and Collective … – PMC
43. Effects of quilts on comfortable indoor temperatures and …
44. Creating arts and crafting positively predicts subjective … – PMC
45. Make your own DIY gallery wall with repurposed vintage …
47. Eco-Sustainability of the Textile Production: Waste Recovery …
48. Clothing and Textiles Intermediate Project Area Guide
49. What You Can Do to Reduce Plastic Waste
50. Houseplants for Healthier Indoor Air
51. Vertical Gardens: Maximize Space and Beat Winter Boredom
52. Cotton Tote Bags – Waste, Politics, and the Environmental …
53. Upcycling: Could My Plastic Bag Someday Become the …
54. Identifying Greener Paper | US EPA
55. Plantable Seed Paper: A Beautiful Way to Reduce Paper Waste
56. Cleaning Up Electronic Waste (E-Waste)
57. Live and digital engagement with the visual arts – PMC
58. Making Art with Electronics and Microcontrollers
59. Is Wrapping Paper Recyclable? – Wrapping Guide
61. Disruptive Effects of Colorful vs. Non-colorful Play Area … – PMC
62. Has anyone done any programming with old vinyl records?
63. Recycled Record Clock : 5 Steps
64. The Challenges of Big Data Storage in Business